Custom Service Worker Location
While extremely lightweight, the aimtell-worker.js file you need to upload is rather instrumental in enabling the logic behind our platform and web push notifications in general. In short, it enables us to listen for incoming push notifications even when someone has left your website.
The need for the file to be in the root directory actually stems from the fact that the file must be in the same directory as the page where someone wants to subscribe to notifications (a security measure enforced by Google). See more on this here .
That said, while the file itself is required, you *can *place out outside of the root directory and still allow visitors to subscribe while on any page. It requires a couple of extra technical steps but if you have a developer handy they should be able to implement it without any hassle.
Note: While you can upload the aimtell-worker.js to any path on your site with this technique, it must still be on your site. Meaning, if your site is https://yoursite.com, the worker can not be referenced on https://anothersite.com
Here's a guide on how that can be done:
1. Update the worker file to pass a custom header: "Service-Worker-Allowed: /"
For this example, let's imagine you wanted to upload your worker to a custom path:
https://yoursite.com/directory/path/aimtell-worker.jsThe key ingredient here is, in order for this to work you need to make sure that file passes back the custom header:
Service-Worker-Allowed: /There are various ways that this can be accomplished serverside but most commonly via either your .htaccess files or server-side language.
PHP Example
For example, if you are using PHP you could adjust your worker file to be called a file called aimtell-worker.js.php instead, and within that file define the header.
So, instead of:
https://yoursite.com/directory/path/aimtell-worker.js
You could create a PHP file with the following contents:
<?php
header('Service-Worker-Allowed: /');
header('Content-Type: application/javascript');
?>
importScripts('https://cdn.aimtell.com/sdk/aimtell-worker-sdk.js');
And upload it to:
https://yoursite.com/directory/path/aimtell-worker.js.php
2. Reference the newly created file in your tracking code snippet.
After creating/update the above file, your aimtell-worker should be available to be reached. So, based on our PHP Example, if you added it under https://yoursite.com/directory/path/aimtell-worker.js.php, then you should be able to visit that page and see the aimtell worker code.
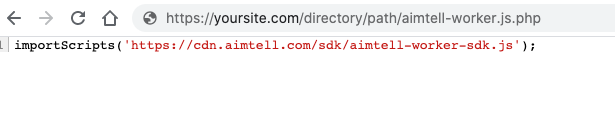
Assuming you see the file, you now need to just declare it in your tracking script. Grab your Aimtell Tracking Code from the dashboard and simply declare it using:
_at.worker = '/directory/path/aimtell-worker.js.php';Specifically, it would look like:
<script>
var _at = _at || {};
_at.domain = 'website.com';
_at.owner = '76c1231hffb19e';
_at.idSite = '2634';
_at.webpushid = 'web.16.aimtell.com';
_at.worker = '/directory/path/aimtell-worker.js.php';
_at.attributes = {};
(function() {var u='//s3.amazonaws.com/cdn.aimtell.com/trackpush/';
var d=document, g=d.createElement('script'), s=d.getElementsByTagName('script')[0];
g.type='text/javascript';
 g.async=true;
 g.defer=true;
 g.src=u+'trackpush.min.js';
 s.parentNode.insertBefore(g,s);
})();
</script>That's it! Now you should be able to view your site and get the opt-in prompt as expected!