Install on ClickFunnels
Step 1. Add the Site.
In order to get started, you'll need to add the website into Aimtell if you haven't already. To do so, login and go to Websites >Add New.
During this process, select Install With Javascript. Copy the tracking code provided and download the service worker file to your computer.
Step 2. Installing Tracking Code
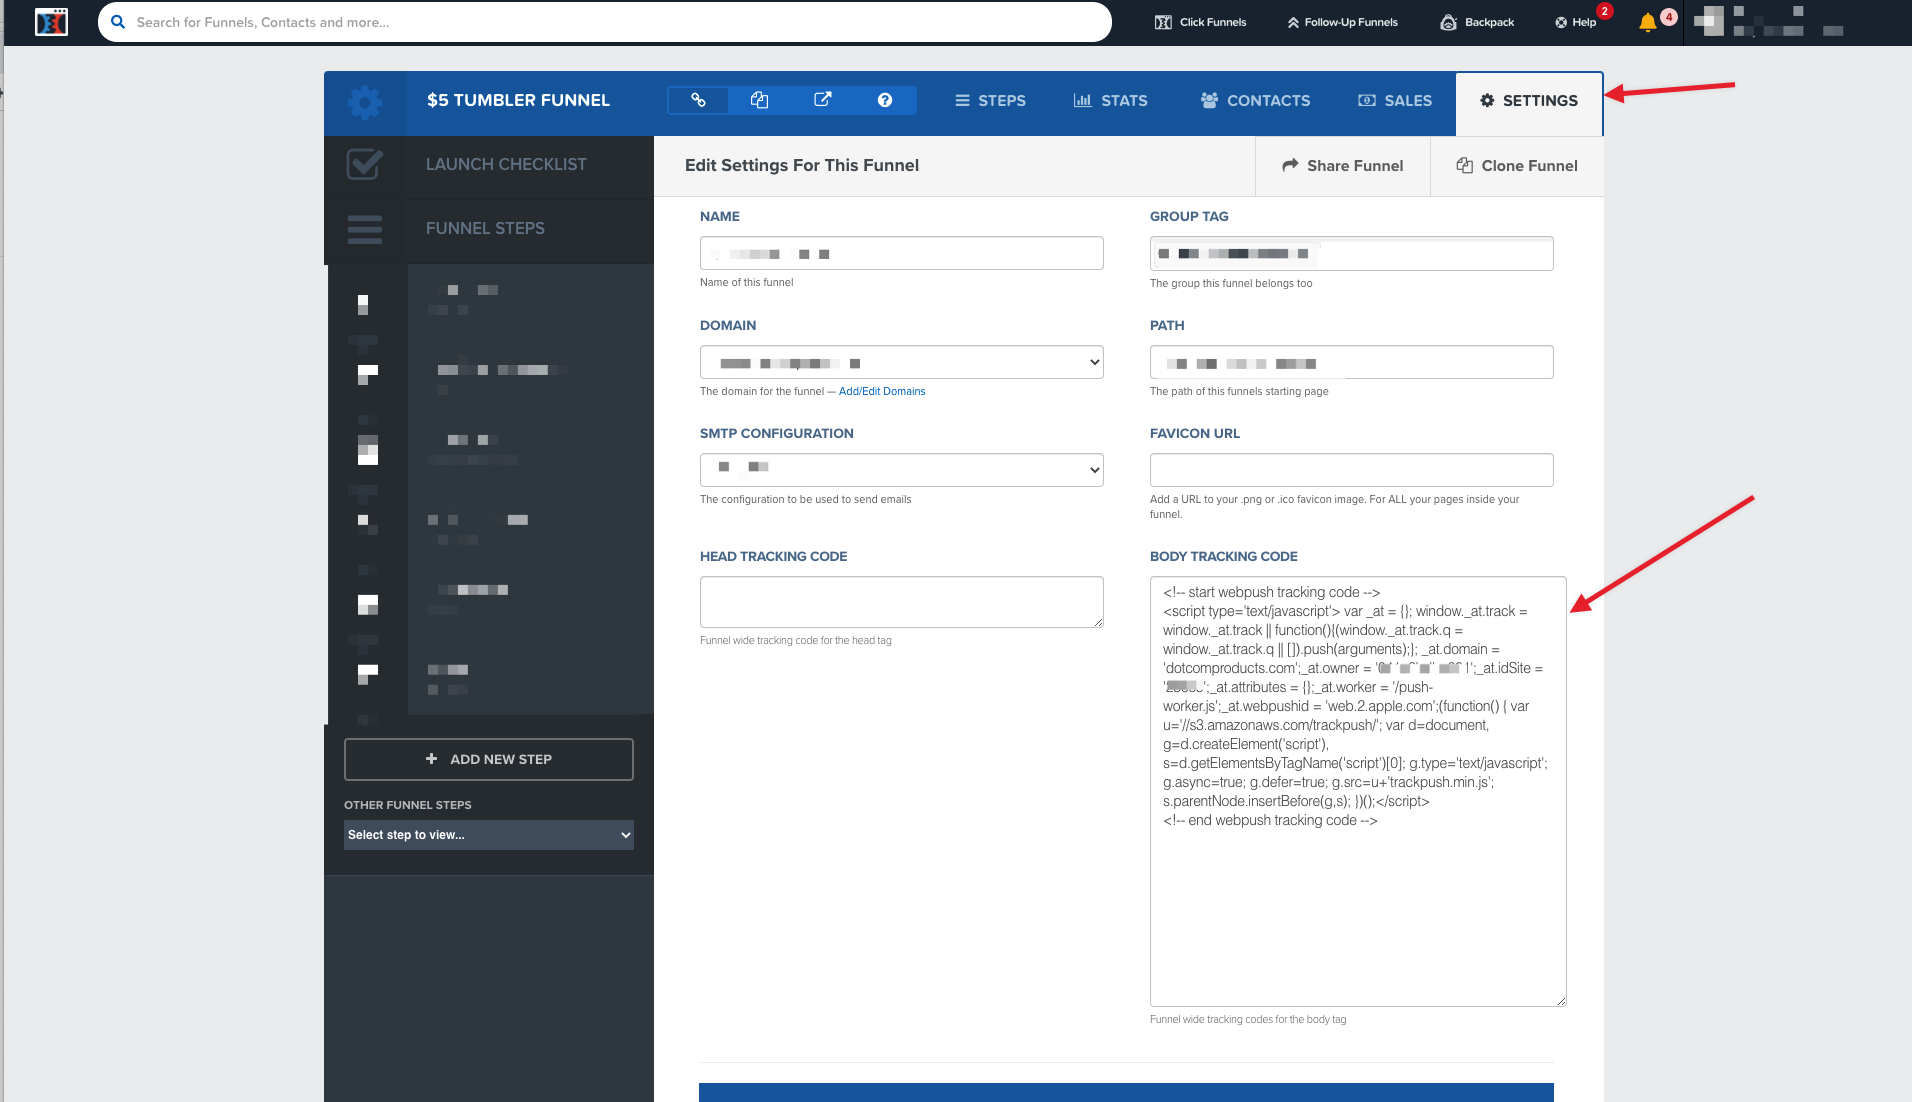
After you've added your site within the Aimtell dashboard, head back to your ClickFunnels account and open the editor for your particular funnel.
On the funnel section, click settings and paste your code under the Body Tracking Code section and hit save.

Step 3. Upload Service Worker
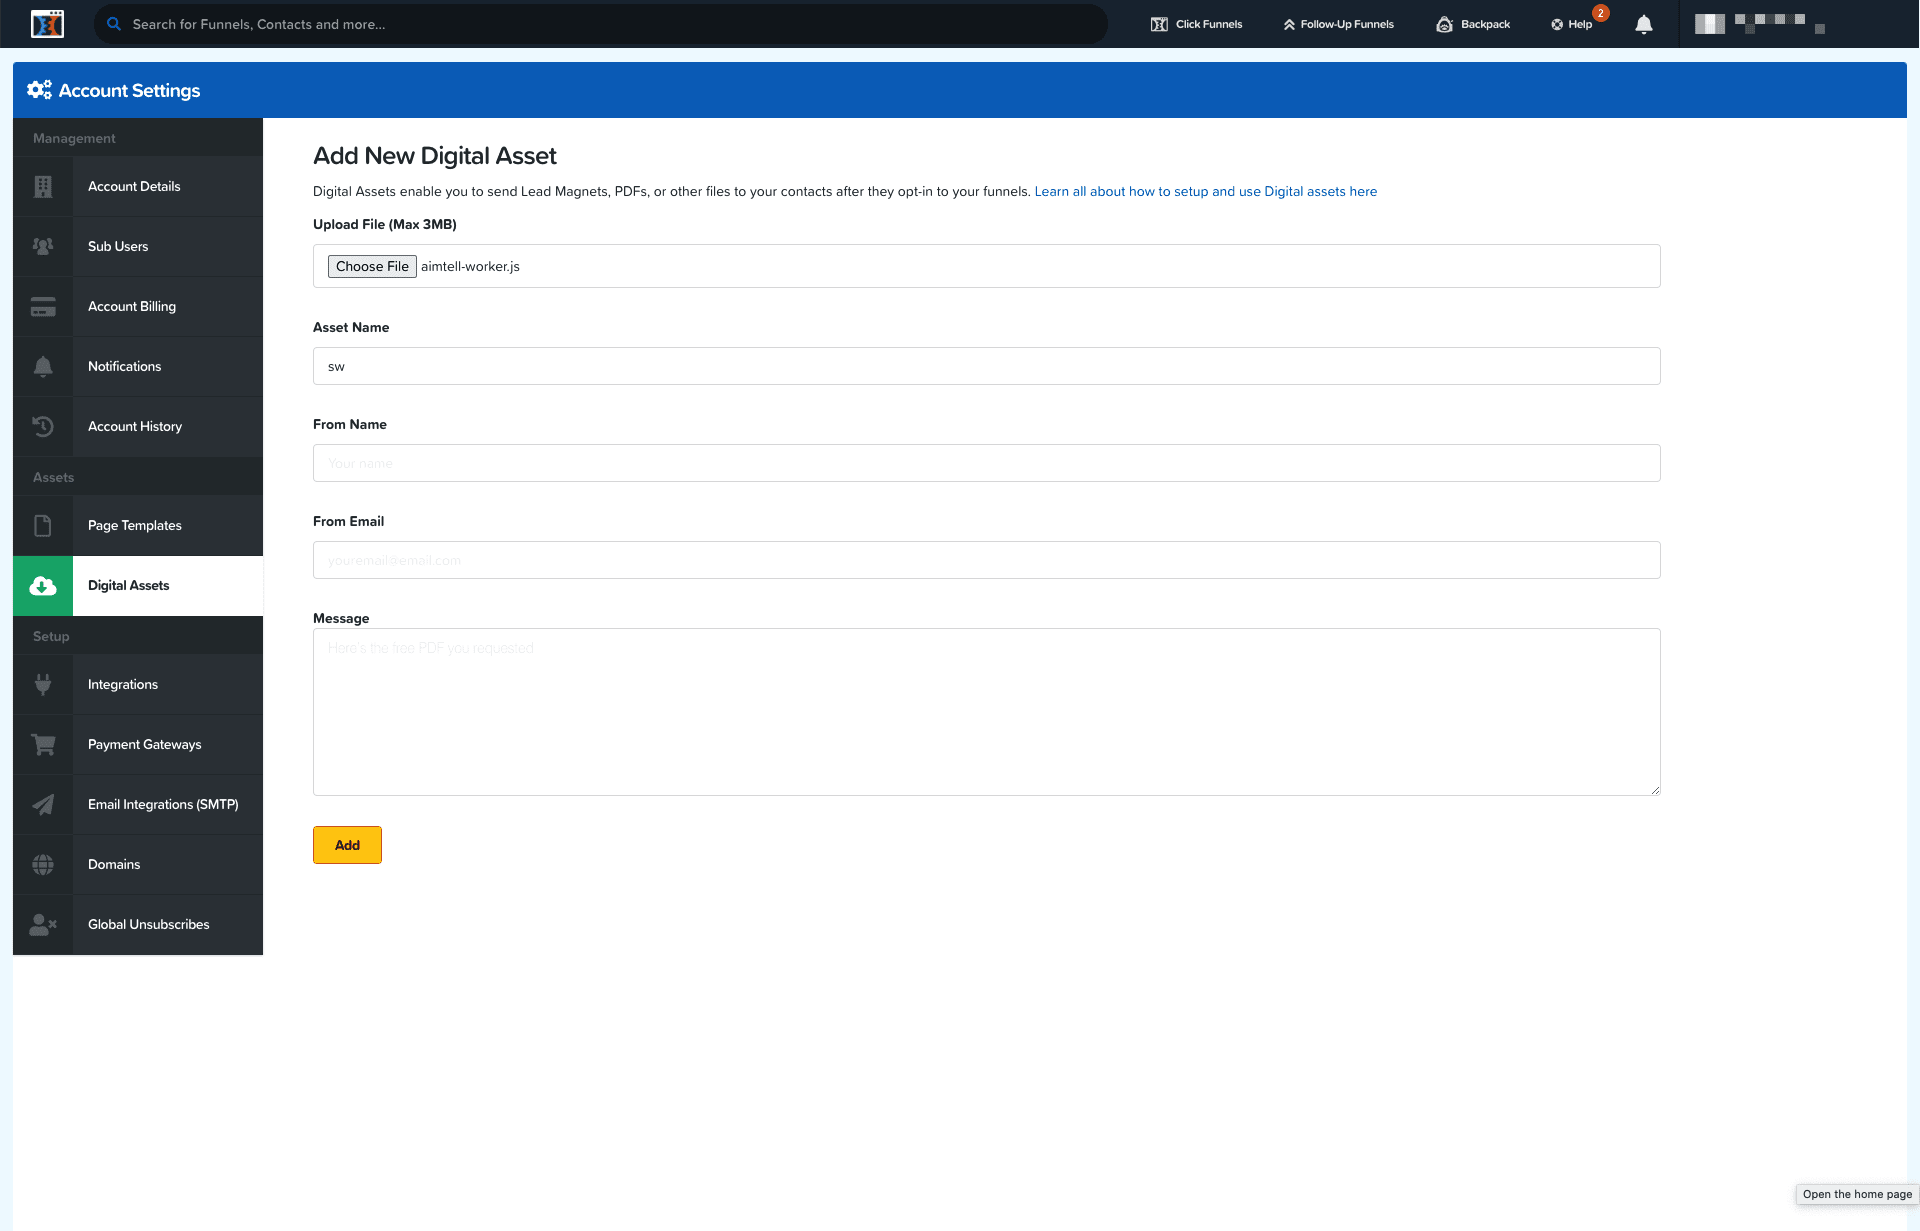
Next, you'll need to upload the Aimtell Service Worker (found under Websites & Setup > Tracking Code in dashboard) to your ClickFunnels account.
To do this, head to Account Settings > Digital Assets in your ClickFunnels account. When on this page, upload the "aimtell-worker.js" file provided from your dashboard.

After saving, make note of the path of the digital asset, it usually looks something like:
*https://d2saw6je89goi1.cloudfront.net/uploads/digital_asset/file/883303/aimtell-worker.js *
Step 4. Update Website Settings In Aimtell
The final step is to update your advanced settings in the Aimtell Dashboard to support this worker.
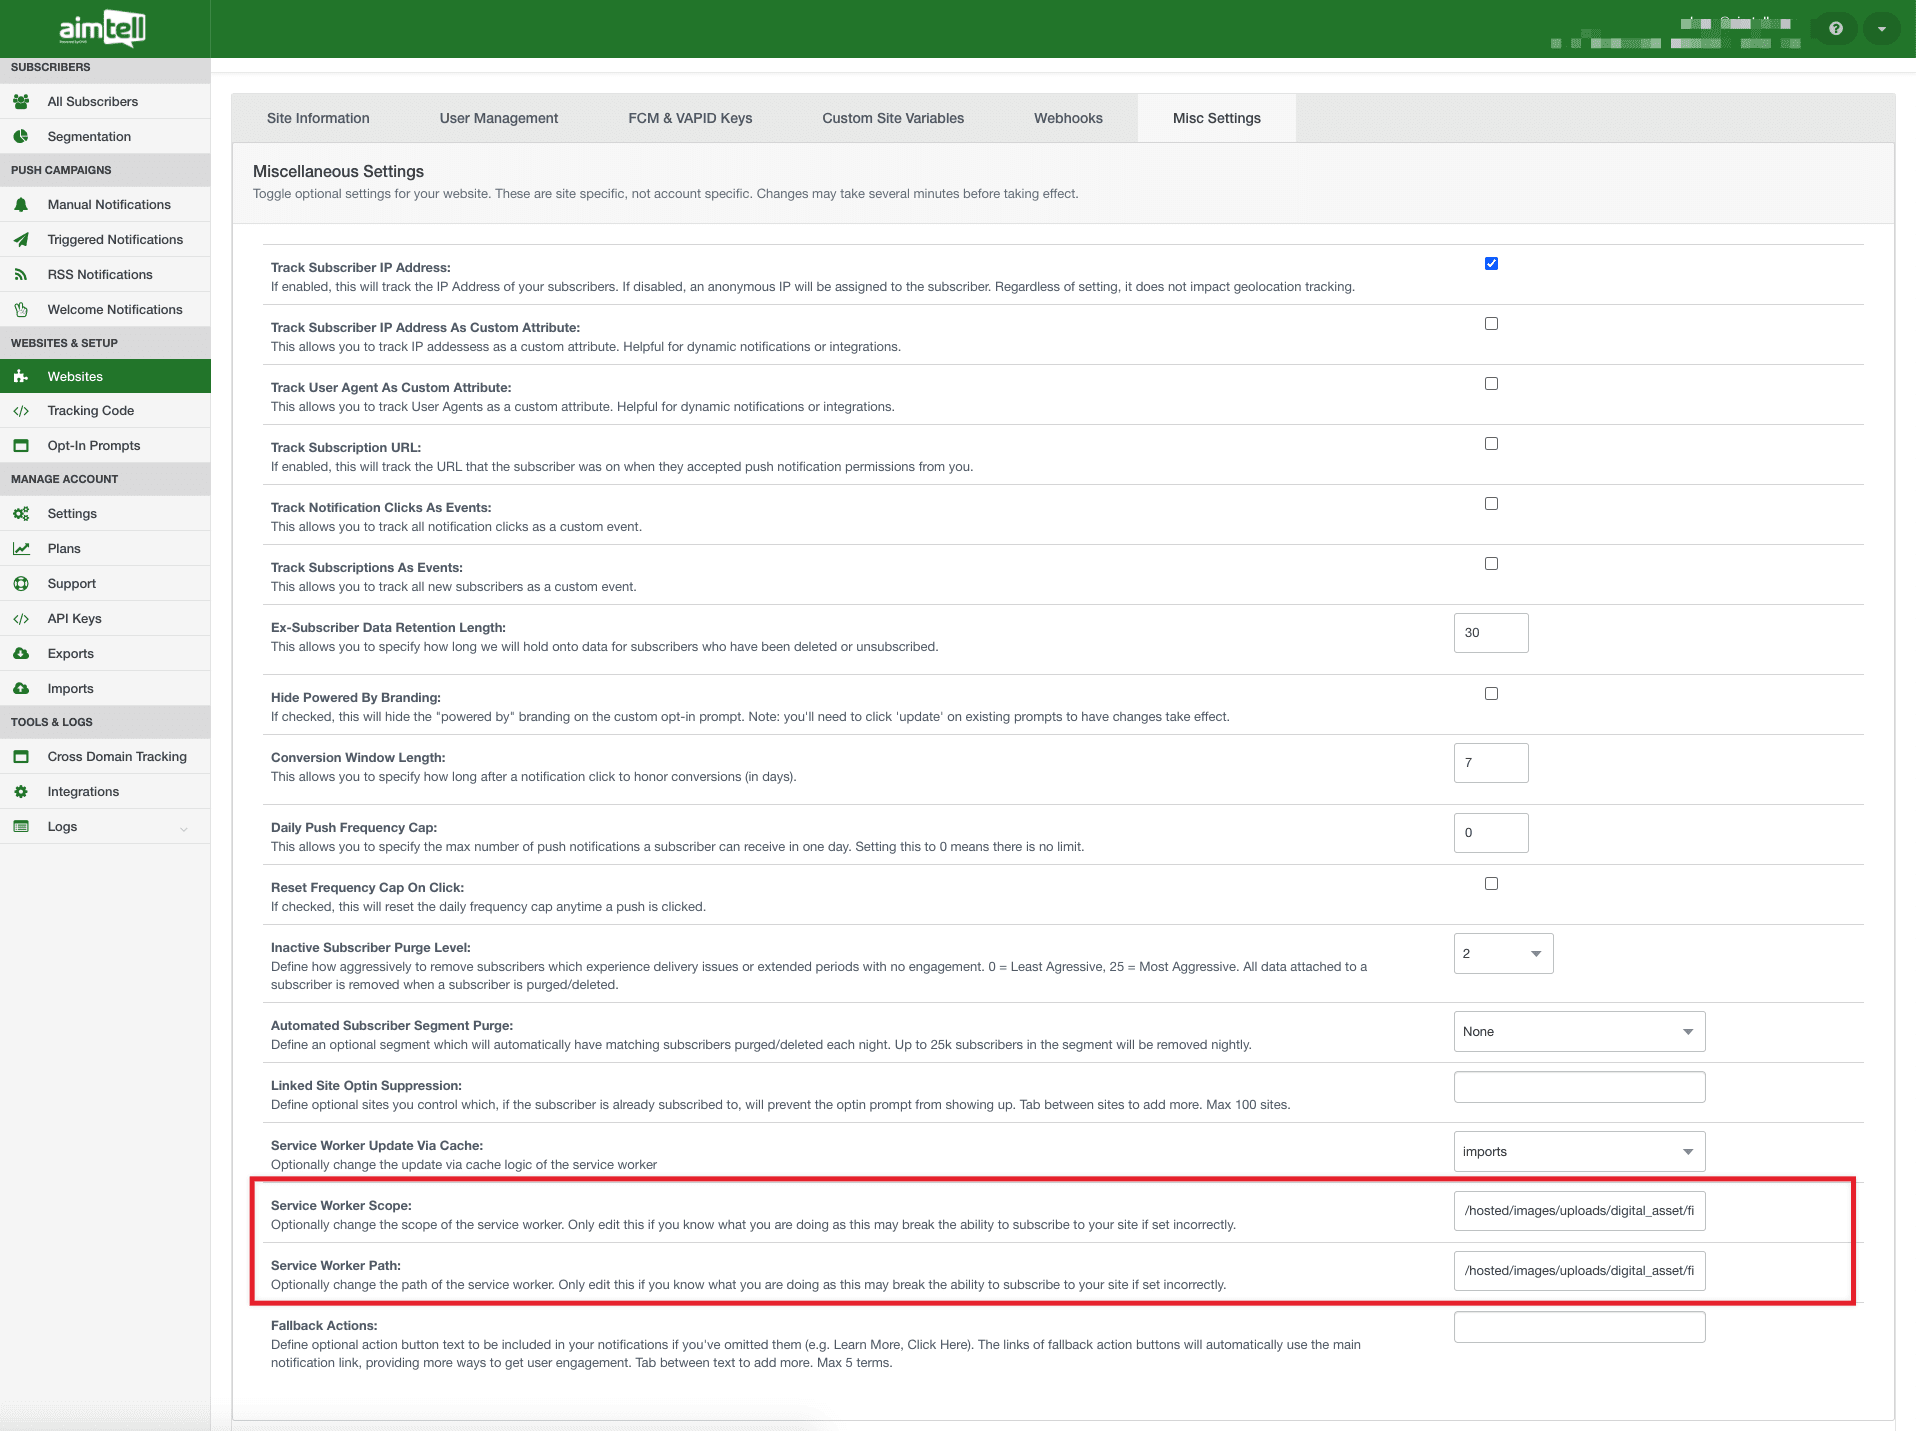
Within your Aimtell dashboard, head to Websites > Edit > Misc Settings. Under the Custom Worker Scope and Custom Worker Path add the following line but replace the [REPLACE_ME] with the number in the link from Step 3 (in this case 883303).
*/hosted/images/uploads/digital_asset/file/[REPLACE_ME]/aimtell-worker.js *
So, in our specific case we'll put the following in those fields:
*/hosted/images/uploads/digital_asset/file/883923/aimtell-worker.js *

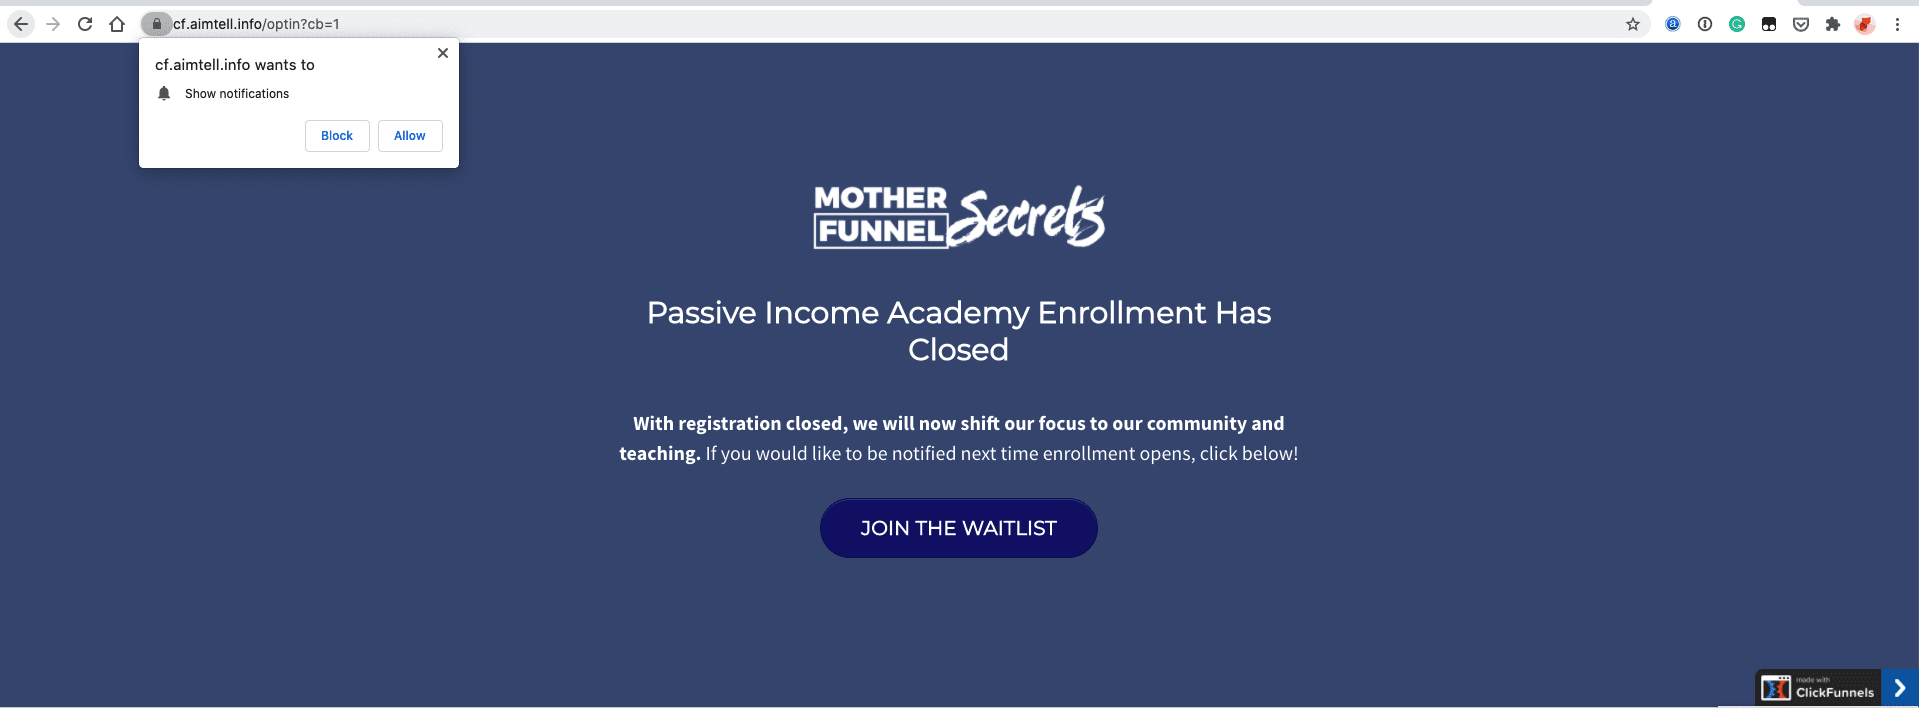
Step 5. Save & Test!
Once you've completed all the steps above you can head back to your website and you should see the prompt appear. If you have any troubles don't hesitate to contact our support team at support@aimtell.com (or open a ticket in your dashboard)

