Using a Custom Opt-in Prompt (Page or Browser Specific Logic)
On your Aimtell dashboard select ‘Opt-In Prompts’ from the sidebar and then select the 'Page-Specific Logic (Advanced)’ tab at the top.
Select 'Page-Specific Logic (Advanced)'.
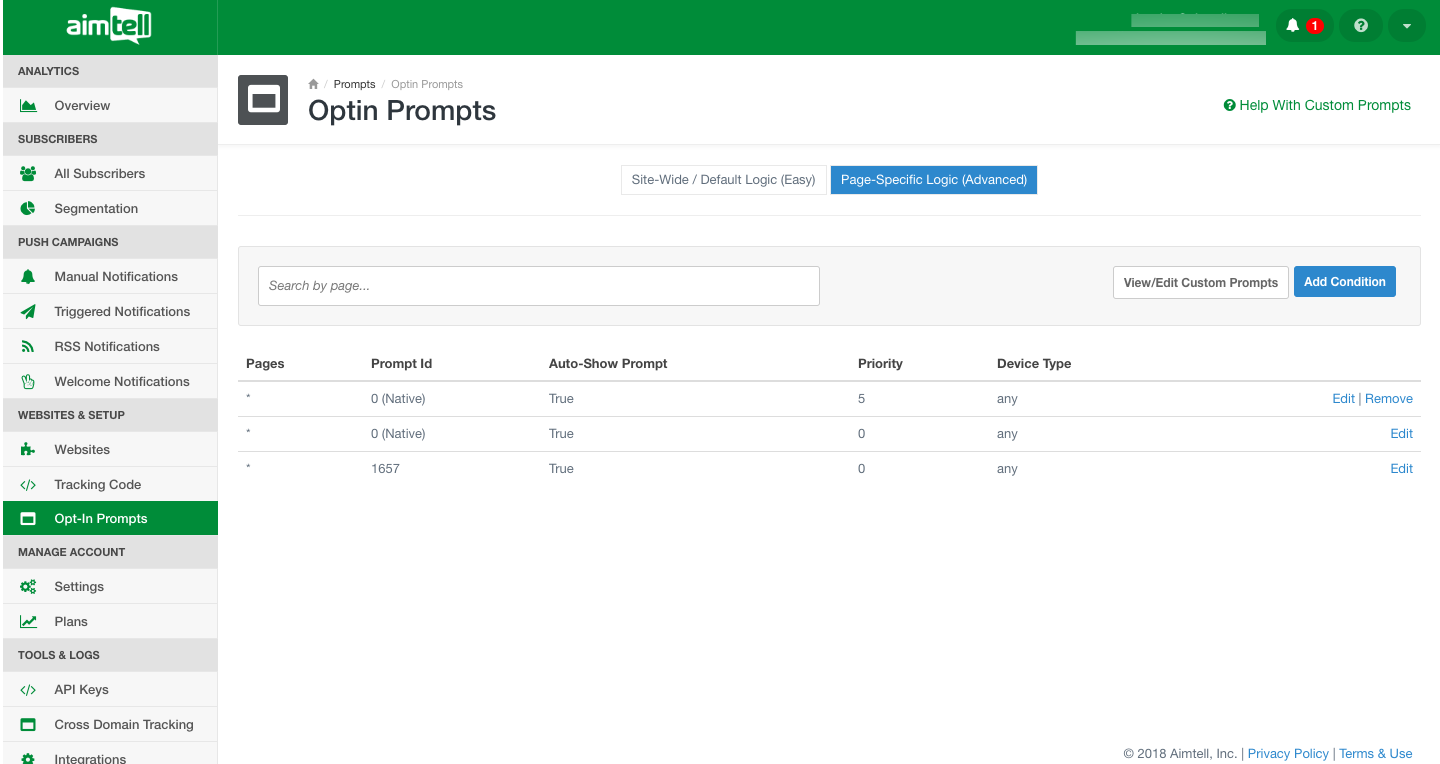
Select 'Add Condition.'
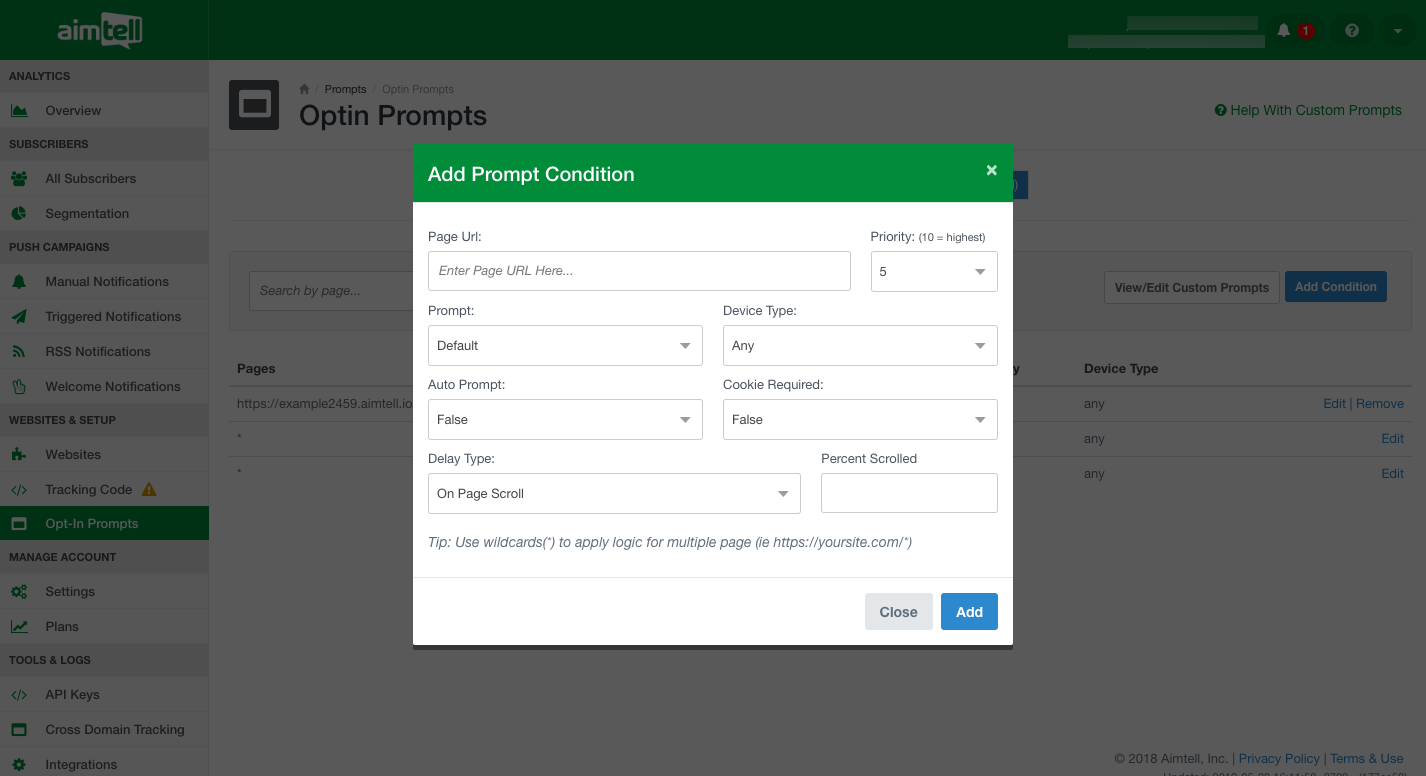
The conditions are as follows:
- Page URL: The specific page you would like the prompt to be displayed on.
- Priority: The importance behind a condition. Conditions with a higher priority will be checked before those with a lower priority.
- Prompt: Which prompt you would like to appear.
- Device Type: Select mobile, desktop, or both.
- Browser: Can choose ‘Any’ or can select a specific browser you would like the prompt to be displayed on.
- Auto Prompt: True or False. Selecting true will show the prompt automatically. Selecting false gives you delay options.
- Cookie Required: Enable cookie request - please note, this is anadvancedfeature.
- Delay Type(this will only display if you set Auto Prompt to ‘False.’)
- On-Page Scroll: A certain percentage of the page needs to be viewed before the prompt appears.
- After X Pages Viewed: A certain amount of pages need to be viewed before the prompt appears.
- After Time Delay: A certain amount of time elapses before the prompt appears.
- With Custom Javascript: Trigger the opt-in prompt programmatically at a time you determine.
When setting up specific page logic you will need to have a wildcard setup. Wildcards (*) allow you to target multiple page URLs with one statement. For instance, imagine your site has the following pages:
yoursite.com/downloads/guide-one
youriste.com/downloads/guide-two
If you wanted to use the same prompt conditions for all of your blog pages, you could use yoursite.com/blog/* . The wildcard essentially means that any number of additional characters will be included.
Note: Page-specific conditions match exactly as is and include URL parameters. This means that if you set a specific prompt to show on "yoursite.com/blog/post-one" and a user arrives at yoursite.com/blog/post-one?utm_source=google, the condition would not be met. Instead, you'd need to put it as "yoursite.com/blog/post-one*" to include any URL parameters.
When you have input all of your conditions, click save and you're done!
Testing Prompt Conditions
If you have a lot of unique prompts and logic, a great way to figure out which prompt will display on which page is to use our testing feature.
While still on the Page-Specific Logic tab you’ll see the Test URL button which will allow you to test any URL you want.
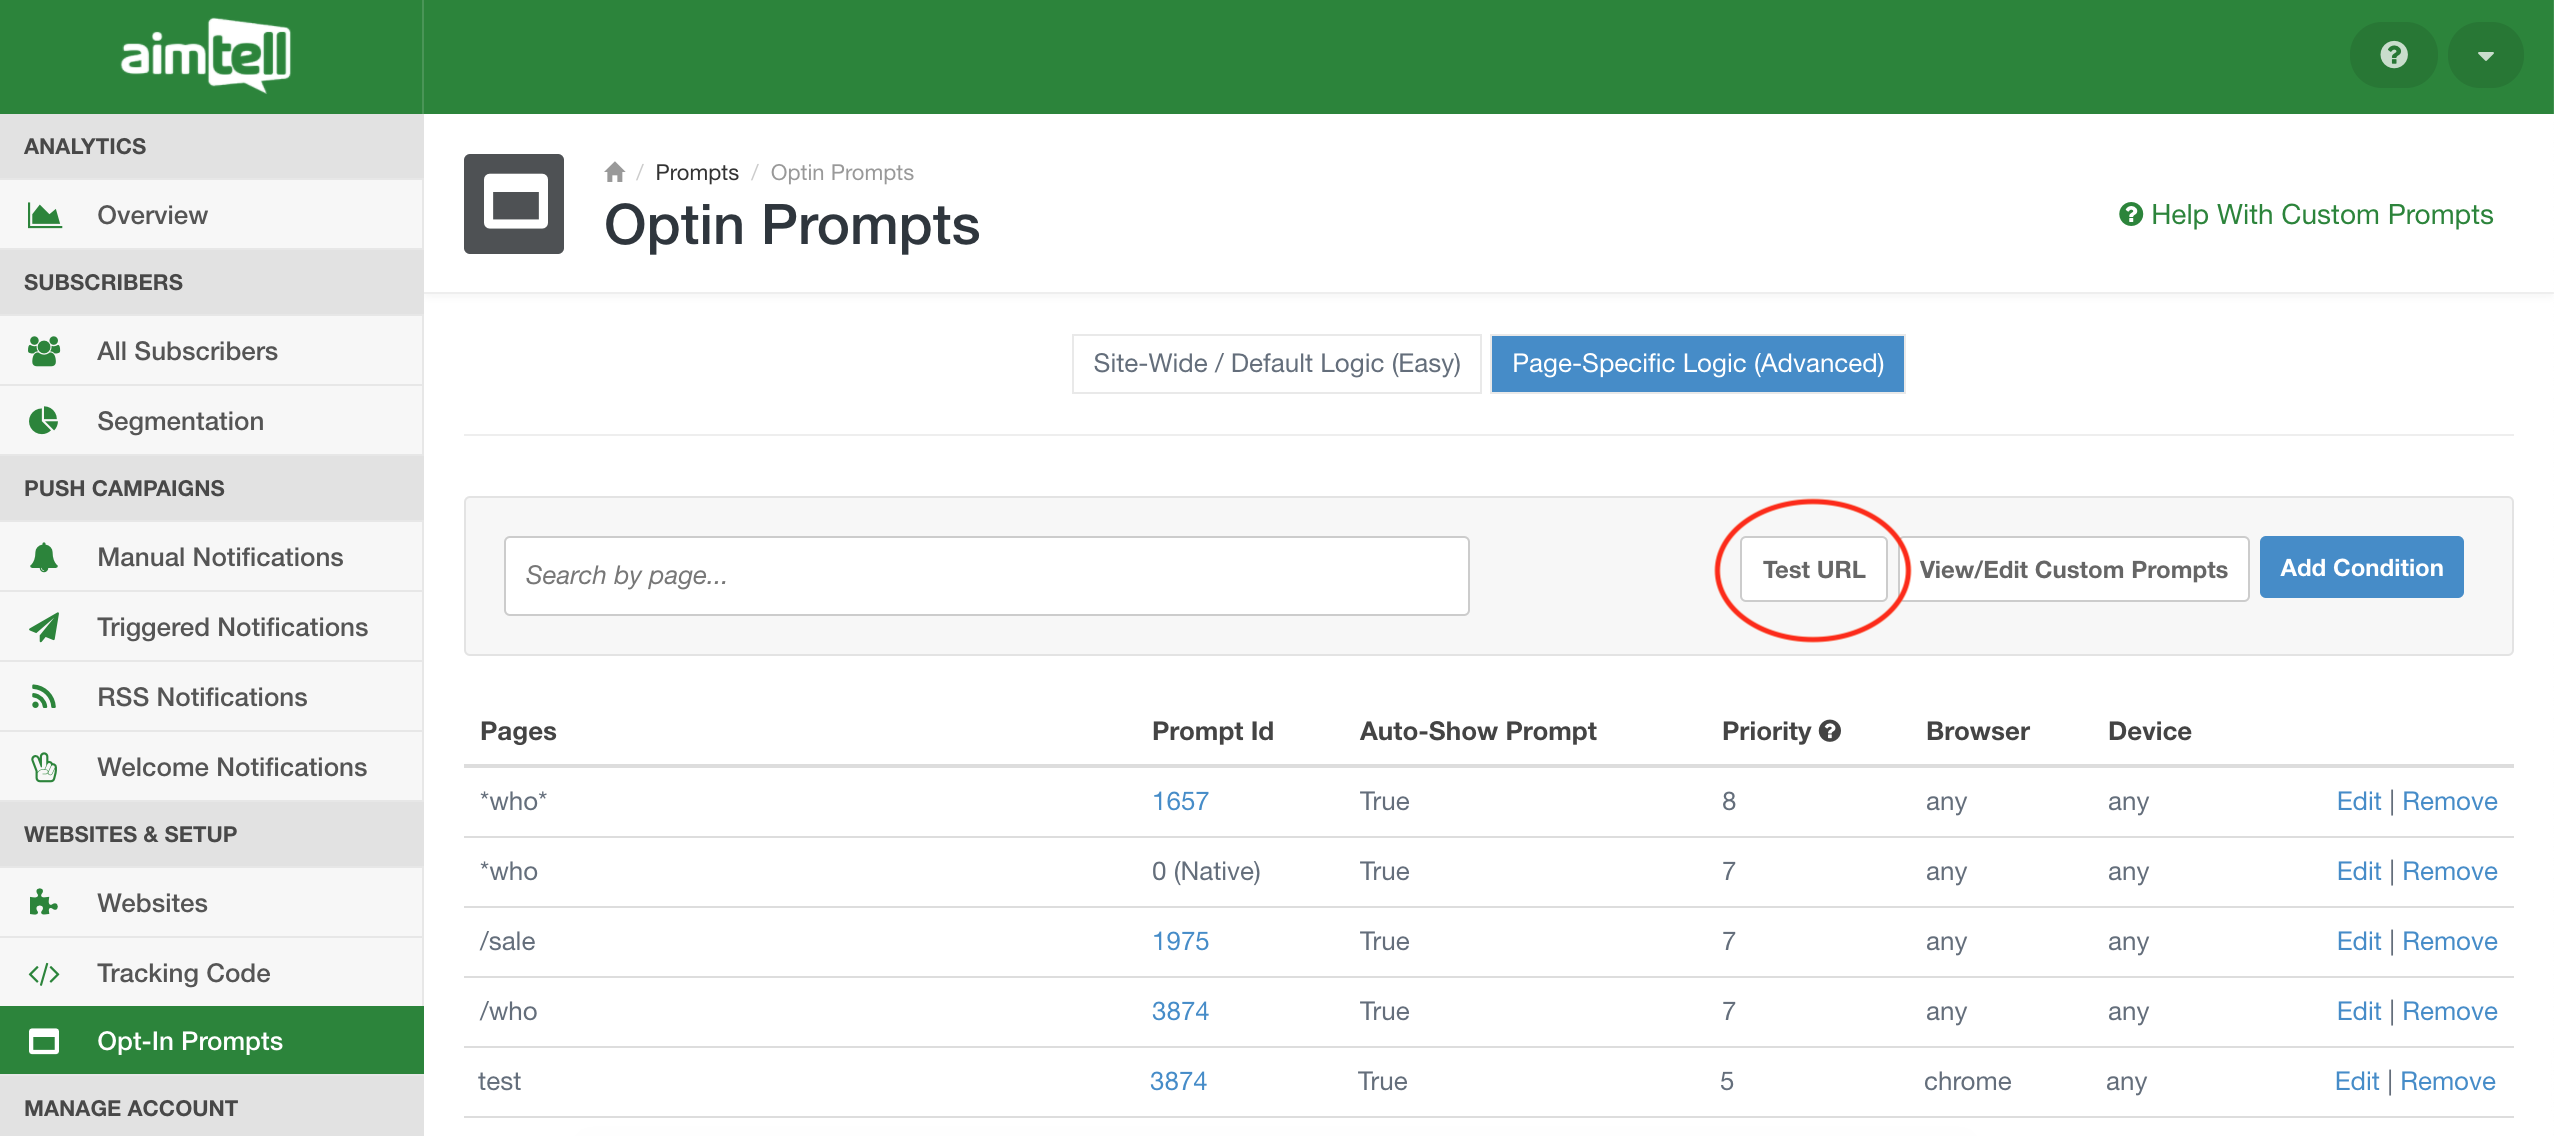 Input a URL and hit ‘Test.’ Your site logic will immediately be tested and the opt-in prompt that will display on that particular page will flash green on the list.
This is a great way to make sure that you have set things up correctly and are displaying prompts at your site the way you intend to. If you test a URL and a different prompt displays than what you want, adjust the logic and test again. Keep in mind that you might need to adjust the priority or add a wildcard (*) to target the correct URL.