
Creating a Welcome Push Notification
In this document, we are going to show you how to set up a welcome notification that will be sent to each new subscriber to your website.
If you’d like to make a welcome drip campaign (series of multiple notifications that go out over time) please follow this documentation instead.
STEPS:
Start off by logging into your Aimtell account and opening your dashboard. From there, select “Welcome Notifications.”
If you have not set one up before, you will see a “No welcome notification yet” screen. Click “Create Welcome Notification” to open the campaign builder.
On the Content tab, input the info requested (title, body, icon, and destination URL). A live preview of the notification appears on the right as you type.
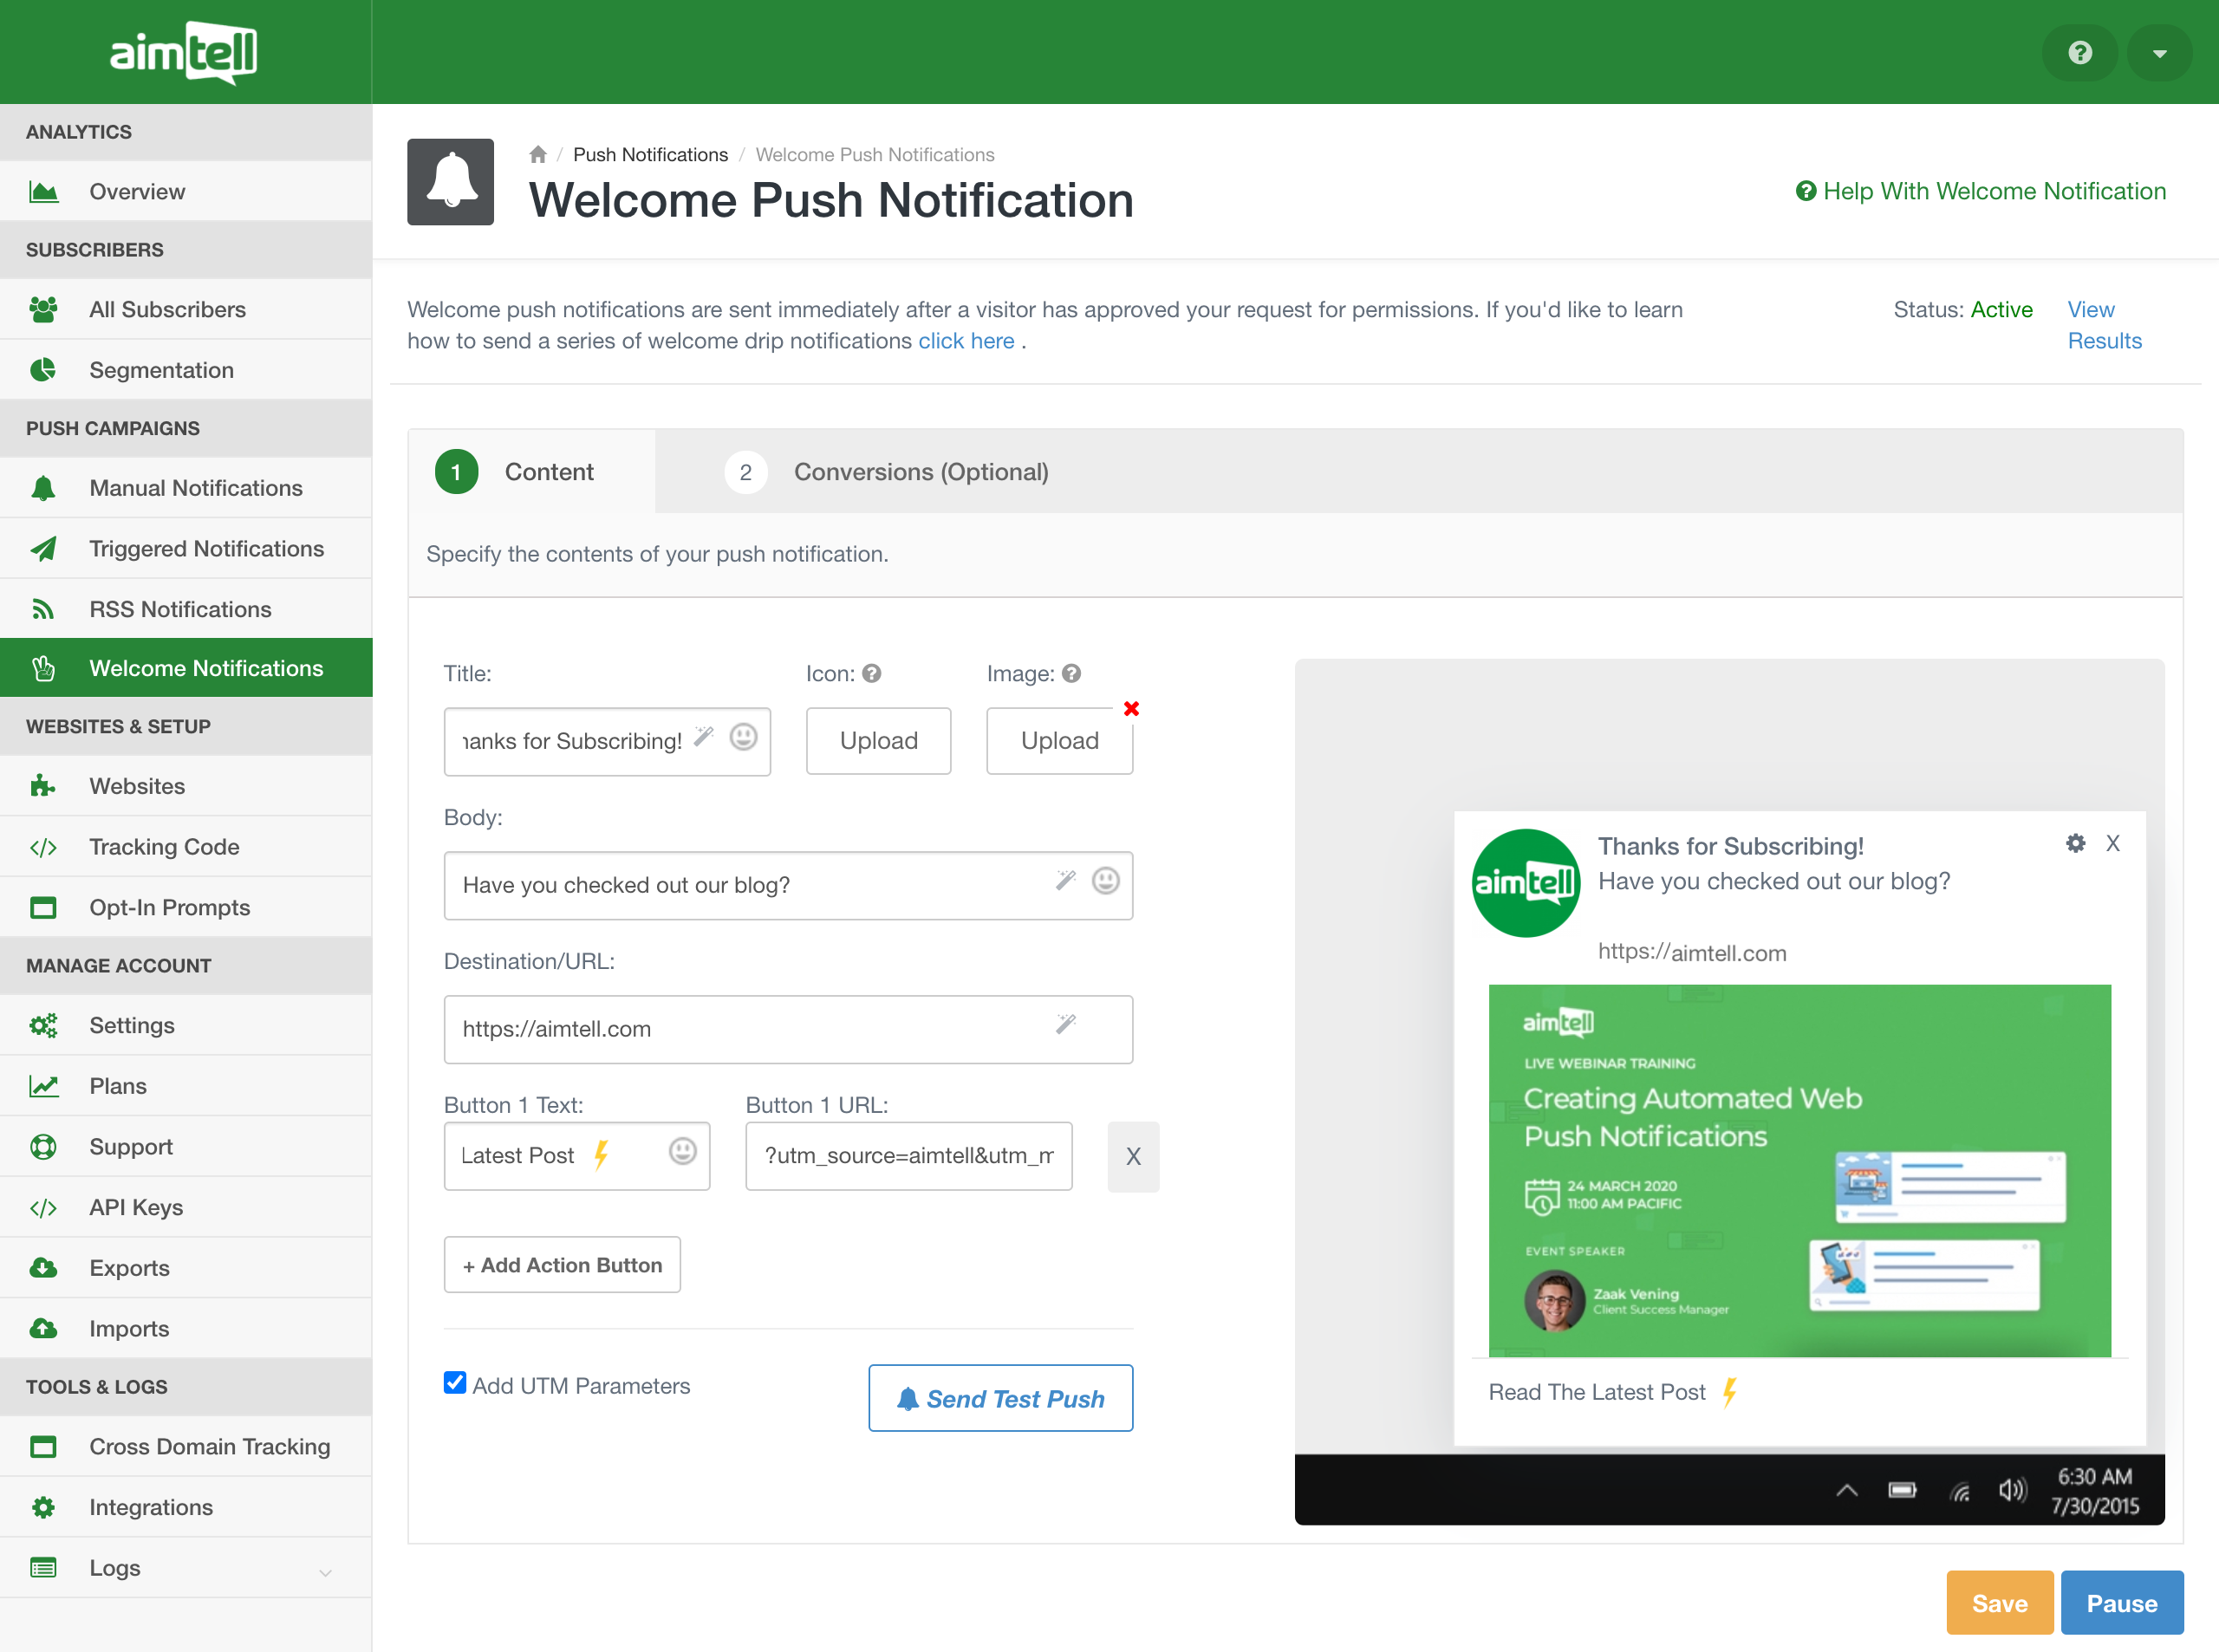
Keep in mind that you can also add up to two action buttons. Action buttons are a great way to customize your push notifications and encourage immediate action. You can read more about this in our utilizing the action button documentation .
You are also able to track conversions that may happen by following the steps in our Tracking Conversions Docs Article on the Conversions(Optional) Tab within the Campaign Builder.
That’s it! When you are done, hit “Activate” at the bottom right of the page to set the campaign live. You can also hit “Save” instead to keep it as a draft and come back to it later. The campaign’s current state is shown as “Status” at the top right of the builder.
Once activated, your welcome push notification will start sending immediately to each new visitor that agrees to be sent your push notifications.