Viewing Campaign Results
Overview of Campaign Results
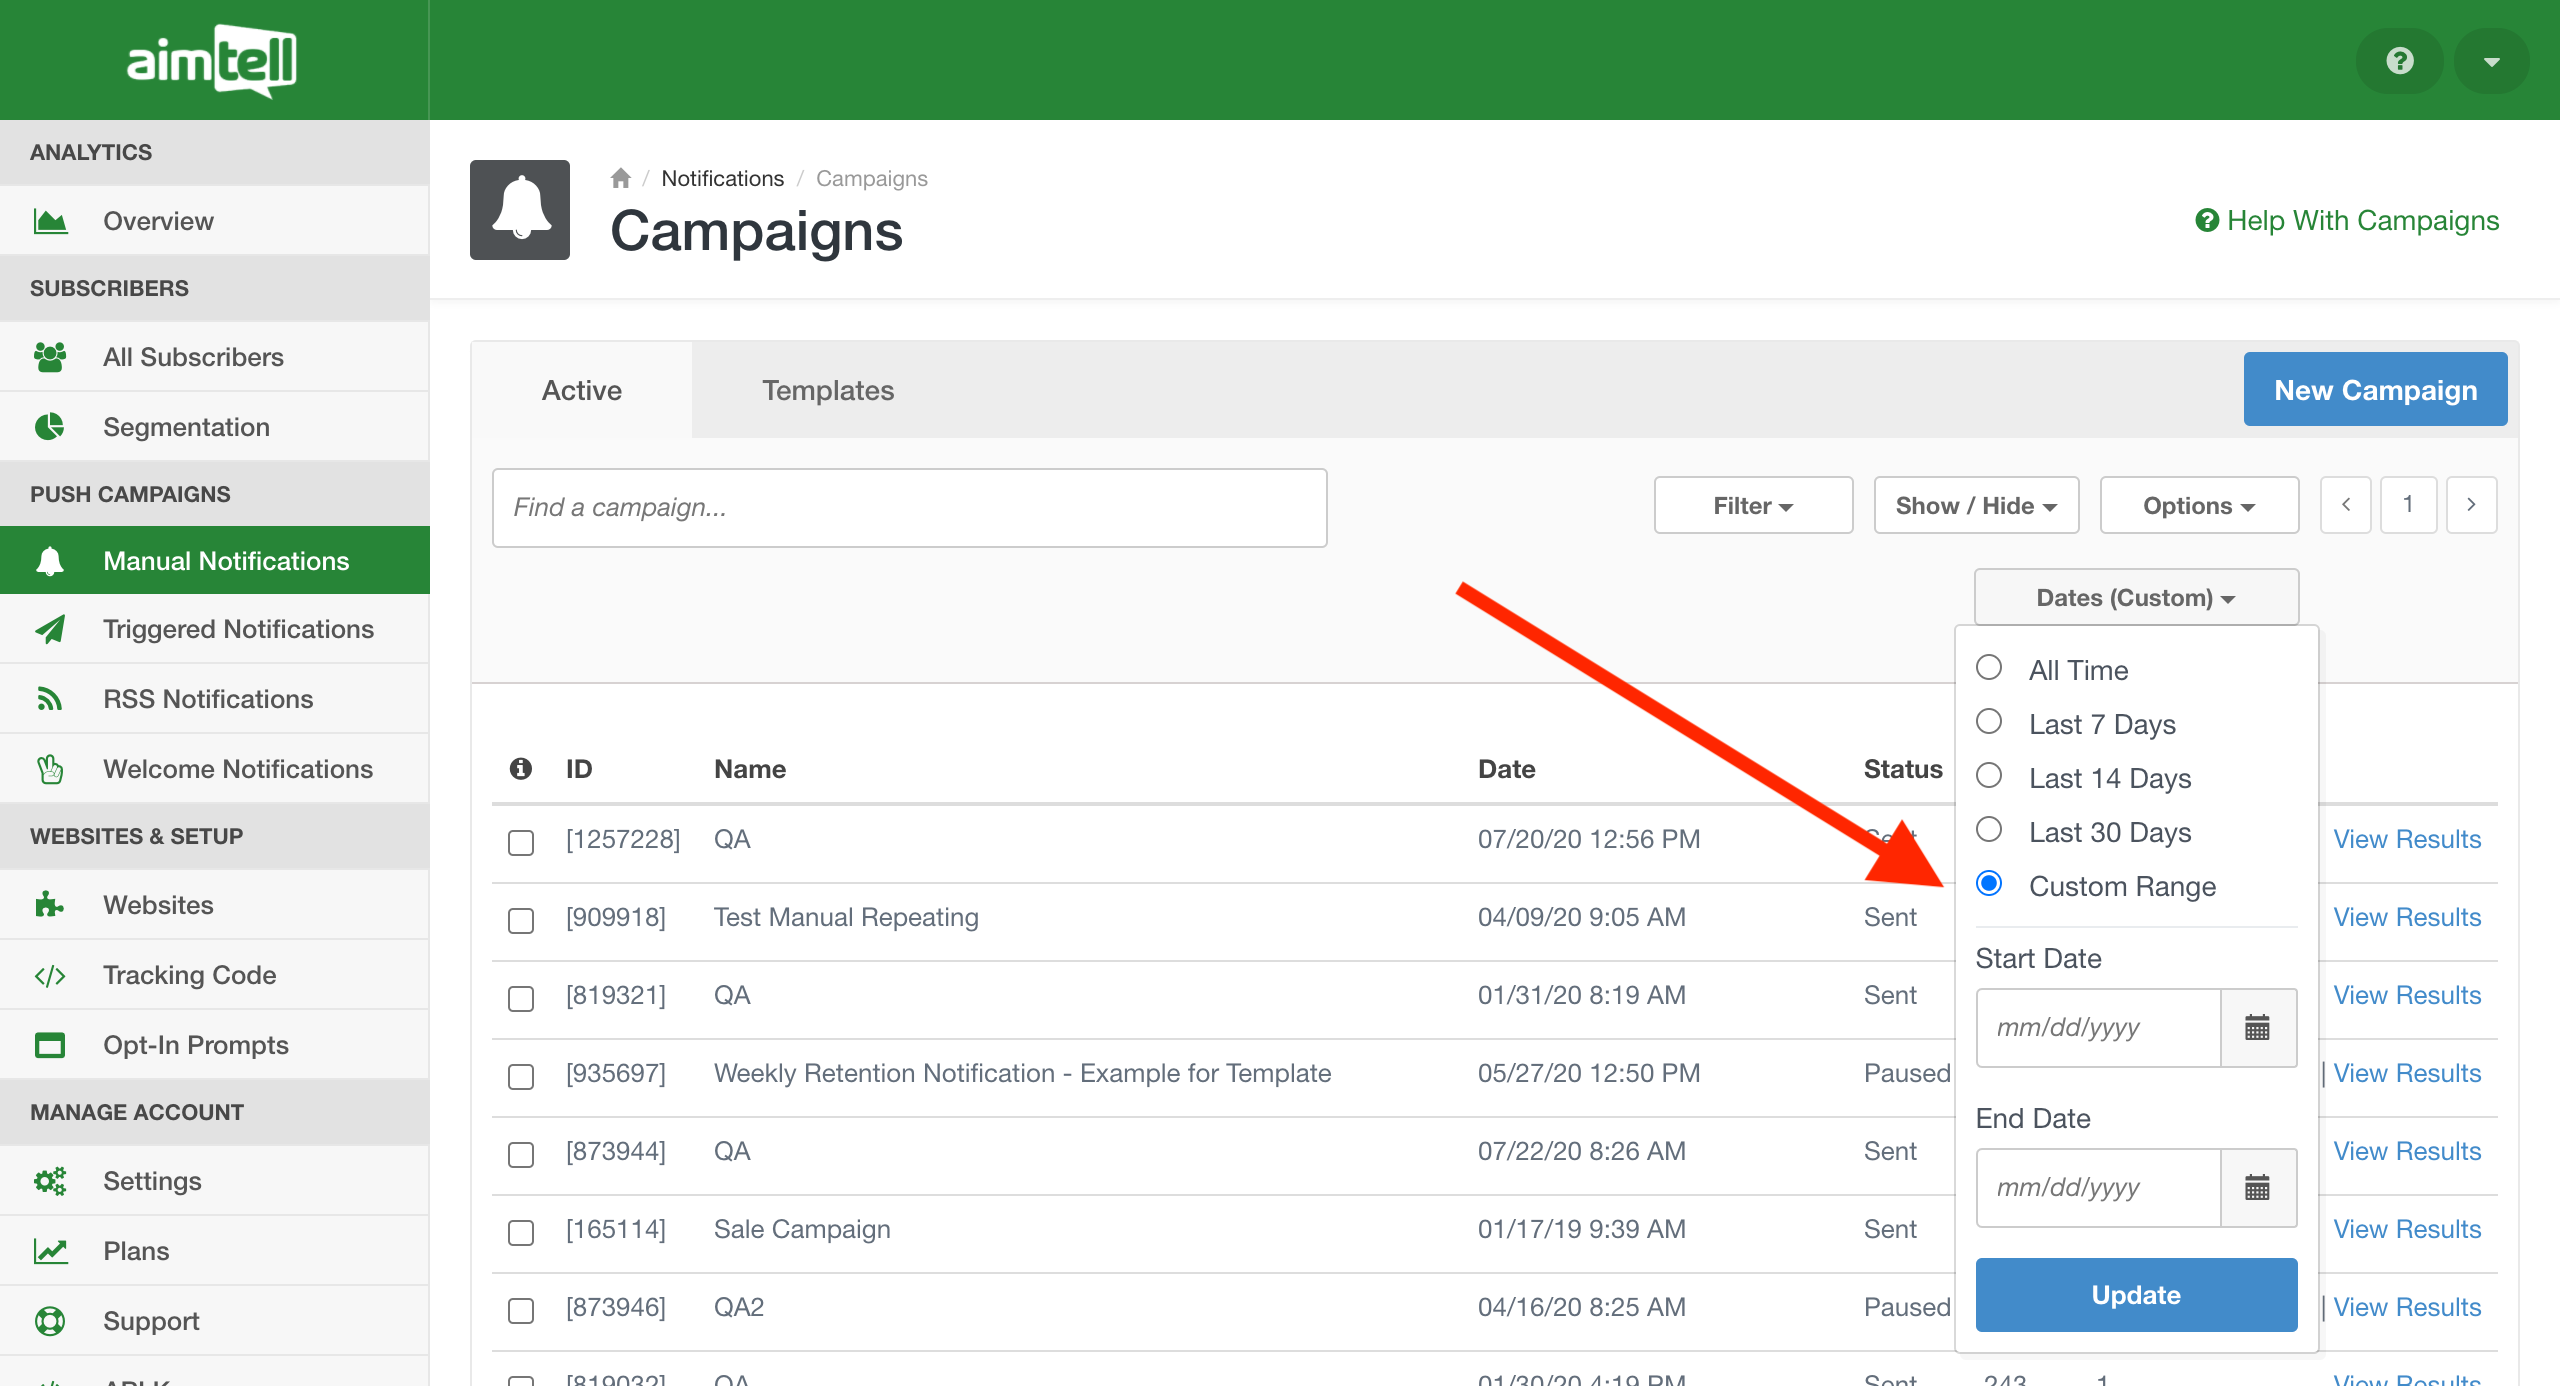
To view the results of a campaign head to the sidebar and select the type of campaign you want to see results for- manual notifications, triggered notifications, RSS notifications, or your welcome notification.
From the overview page, you can quickly see the status for each campaign (draft, scheduled, sent, repeat, paused), how many people the campaign was sent to, how many times it was clicked, the click-through rate (CTR), how many conversions were tracked , what the conversion value is, and if it is running an A/B test.
You can decide which options you want to see on the overview page by selecting the ‘Show/Hide’ menu and unchecking any columns that you do not want to see.
If you prefer to see the data from a specific date range, select the ‘Dates’ tab at the top and use our quick dates options to see results from the past 7, 14, or 30 days. Alternatively, you can input any date range you want by selecting ‘Custom Range.’ Input the range you want and click update to see results from that specific period of time.
Specific Campaign Results
For a specific campaign, click "View Results” next to the desired campaign.
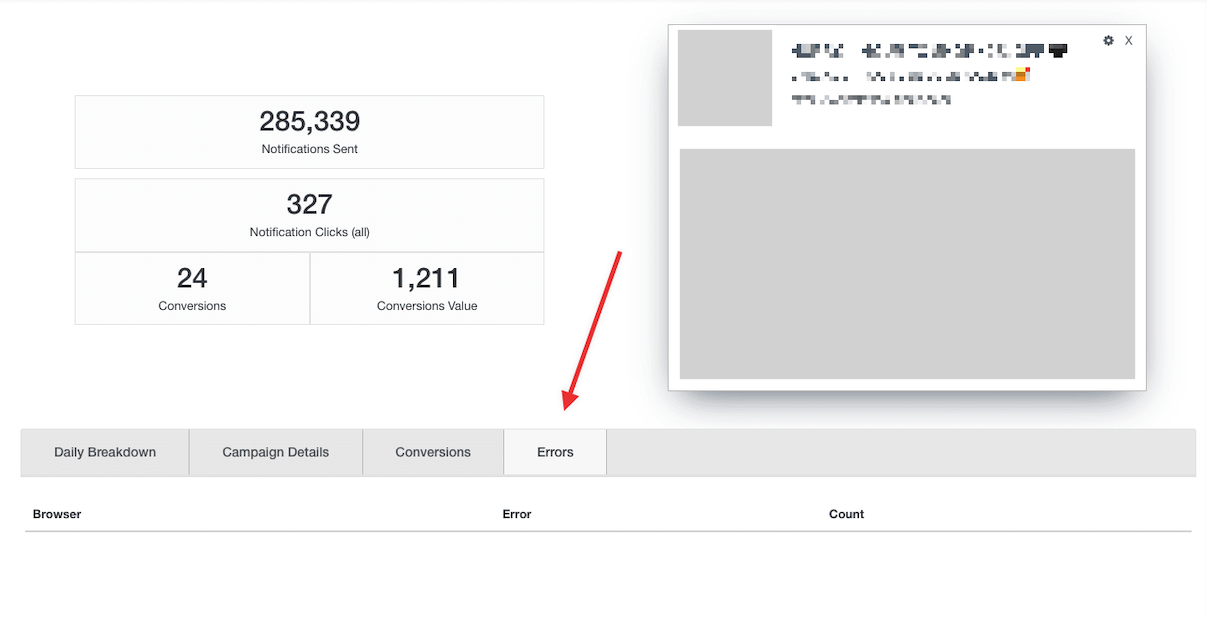
On the results page, you will notice a quick preview of your notification as well as totals for the number of notifications sent, clicked, and any conversions tracked. If you specified an event value, such as a dynamic Dollar Amount, you will also see the total conversion value.
Below this is a series of tabs that will provide you with additional insights on your campaign: Daily Breakdown, Click Pace, Campaign Details, Conversions, and Errors.
Tip: If you want to export your results, select the 'Daily Breakdown' tab, and from the 'Options' drop-down menu you can select 'Download Results.'
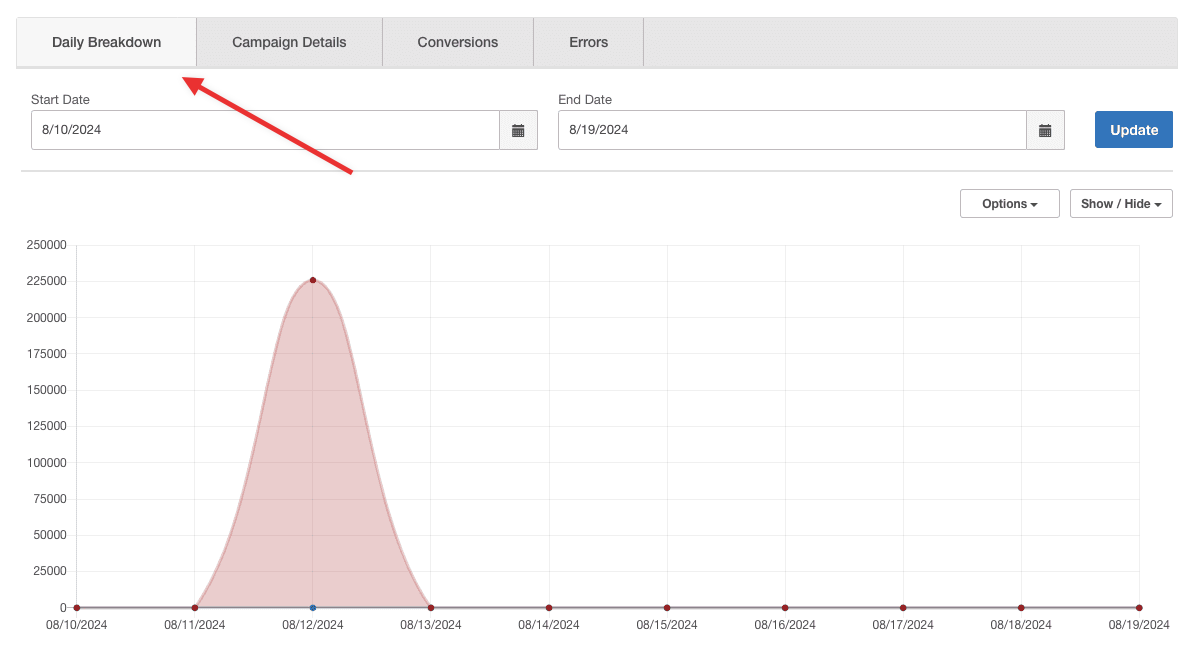
Daily Breakdown:
You can view your daily breakdown in a line graph or bar chart. You can view specific results by hovering over the dot or bar and it will show you how many notifications were sent and how many were clicked.
Note: We always suggest that the date range is for 30 days to ensure that your results are as detailed as possible.
Campaign Details:
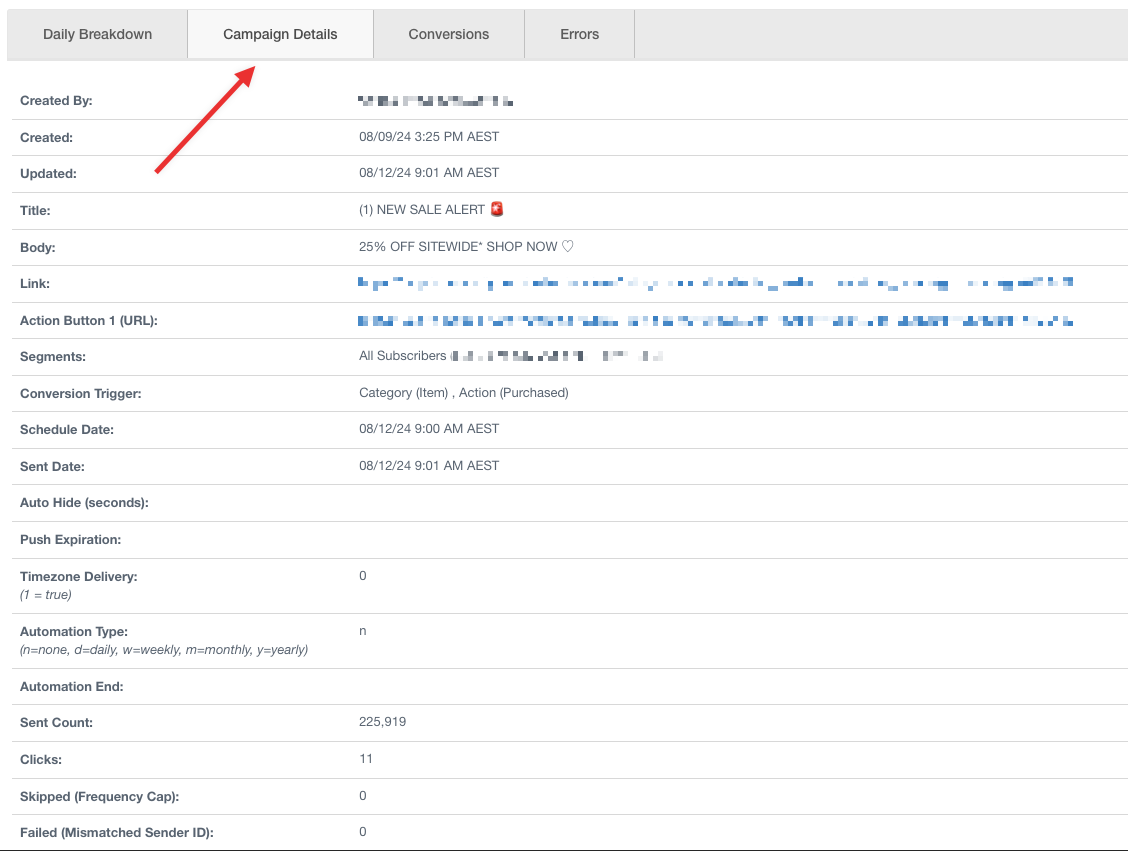
You can see who created the specific campaign, the title, the body, the link, which segments it will go out to, if there were any conversion triggers, the sent and schedule date, and if you chose to auto-hide the campaign.
It will also show you timezone delivery if you chose to optimize by timezone, automation start, and end date, as well as sent count. You can also view how many total clicks, how many were skipped if you set a frequency cap, and how many notifications failed due to a mismatched sender ID.
Conversions:
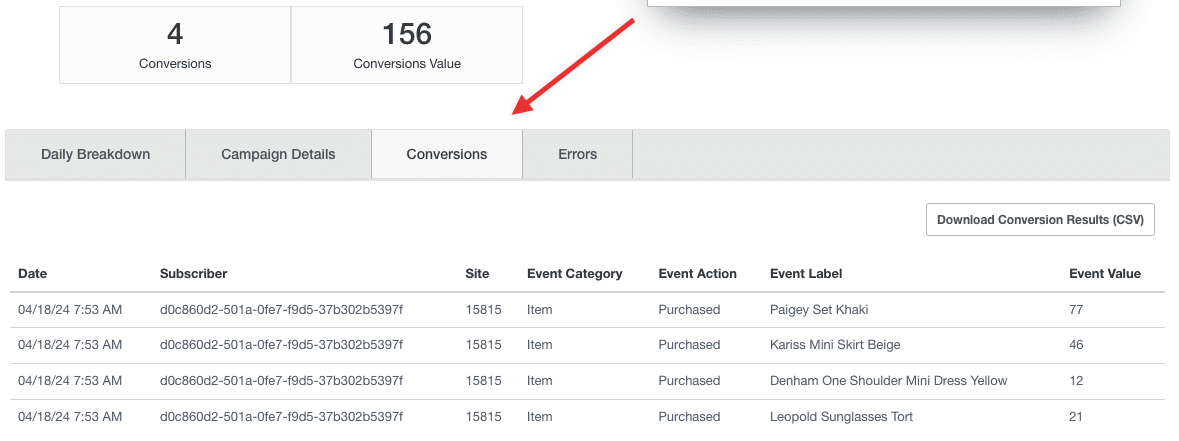
Here you can see the full list of every conversion. You are able to view the subscriber ID associated with the specific conversion as well as the time the conversion occurred, the event category, event action, event label, and event value of each conversion if they have been tracked.
You can learn about conversion tracking here .
Errors:
If any critical errors are discovered while attempting to deliver your notifications, they will be made available here. While some errors may be intuitive and easy to fix, please don't hesitate to reach out to the support team if you are unaware of how to resolve them. Most errors revolve around incorrect GCM/FCM or VAPID Keys.
Tip: Looking to export results for all of a certain type of campaign? You can do so by selecting ‘Download Campaigns’ from the ‘Options’ menu for Manual, Triggered, or RSS campaigns. For your Welcome Notification, hit 'View Results’ in the top right corner of the Welcome Notification screen and then select ‘Download Results’ from the ‘Options’ menu.


