
Follow these steps to create a manual web push campaign that you can either send to all your subscribers or to certain segments.
In this document, we are going to show you how to create a new manual website push notification campaign. These campaigns are not triggered by the actions of your subscribers, but rather are campaigns that you schedule and choose whom to send to.
Steps to Create a Manual Push Campaign
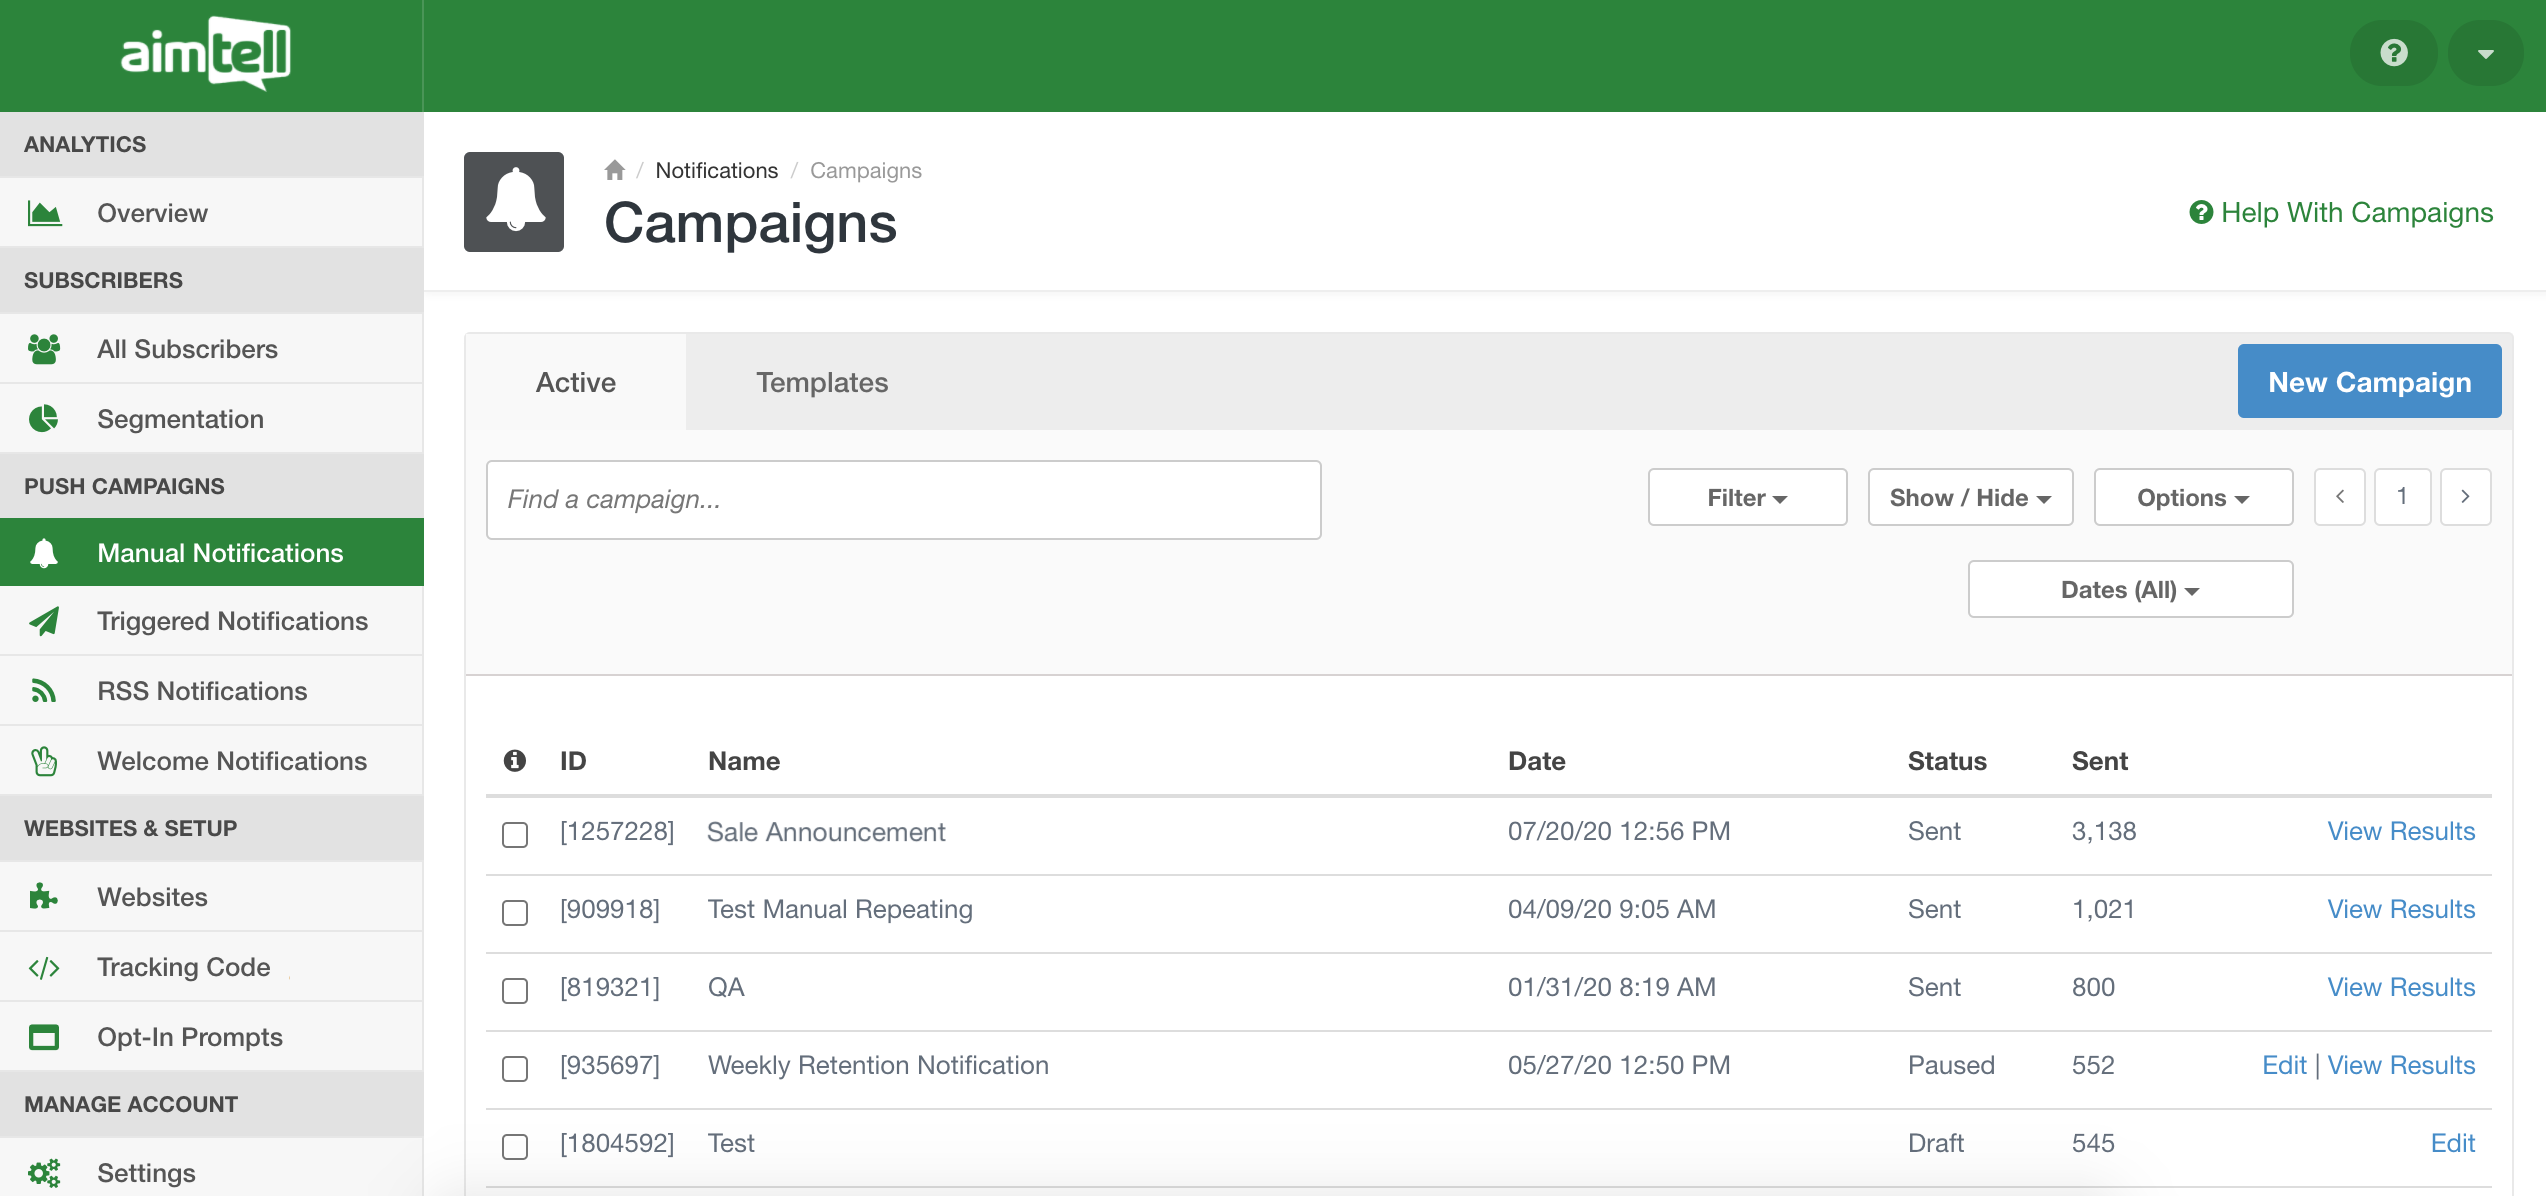
Step 1: Navigate to Your Manual Notifications
Start off by logging into your Aimtell account and opening your dashboard.
From there, click on ‘Manual Notifications’ in the sidebar. This will take you to your campaign page for all of your manual campaigns. On the ‘Active’ tab you will see a list of all of your current manual campaigns.
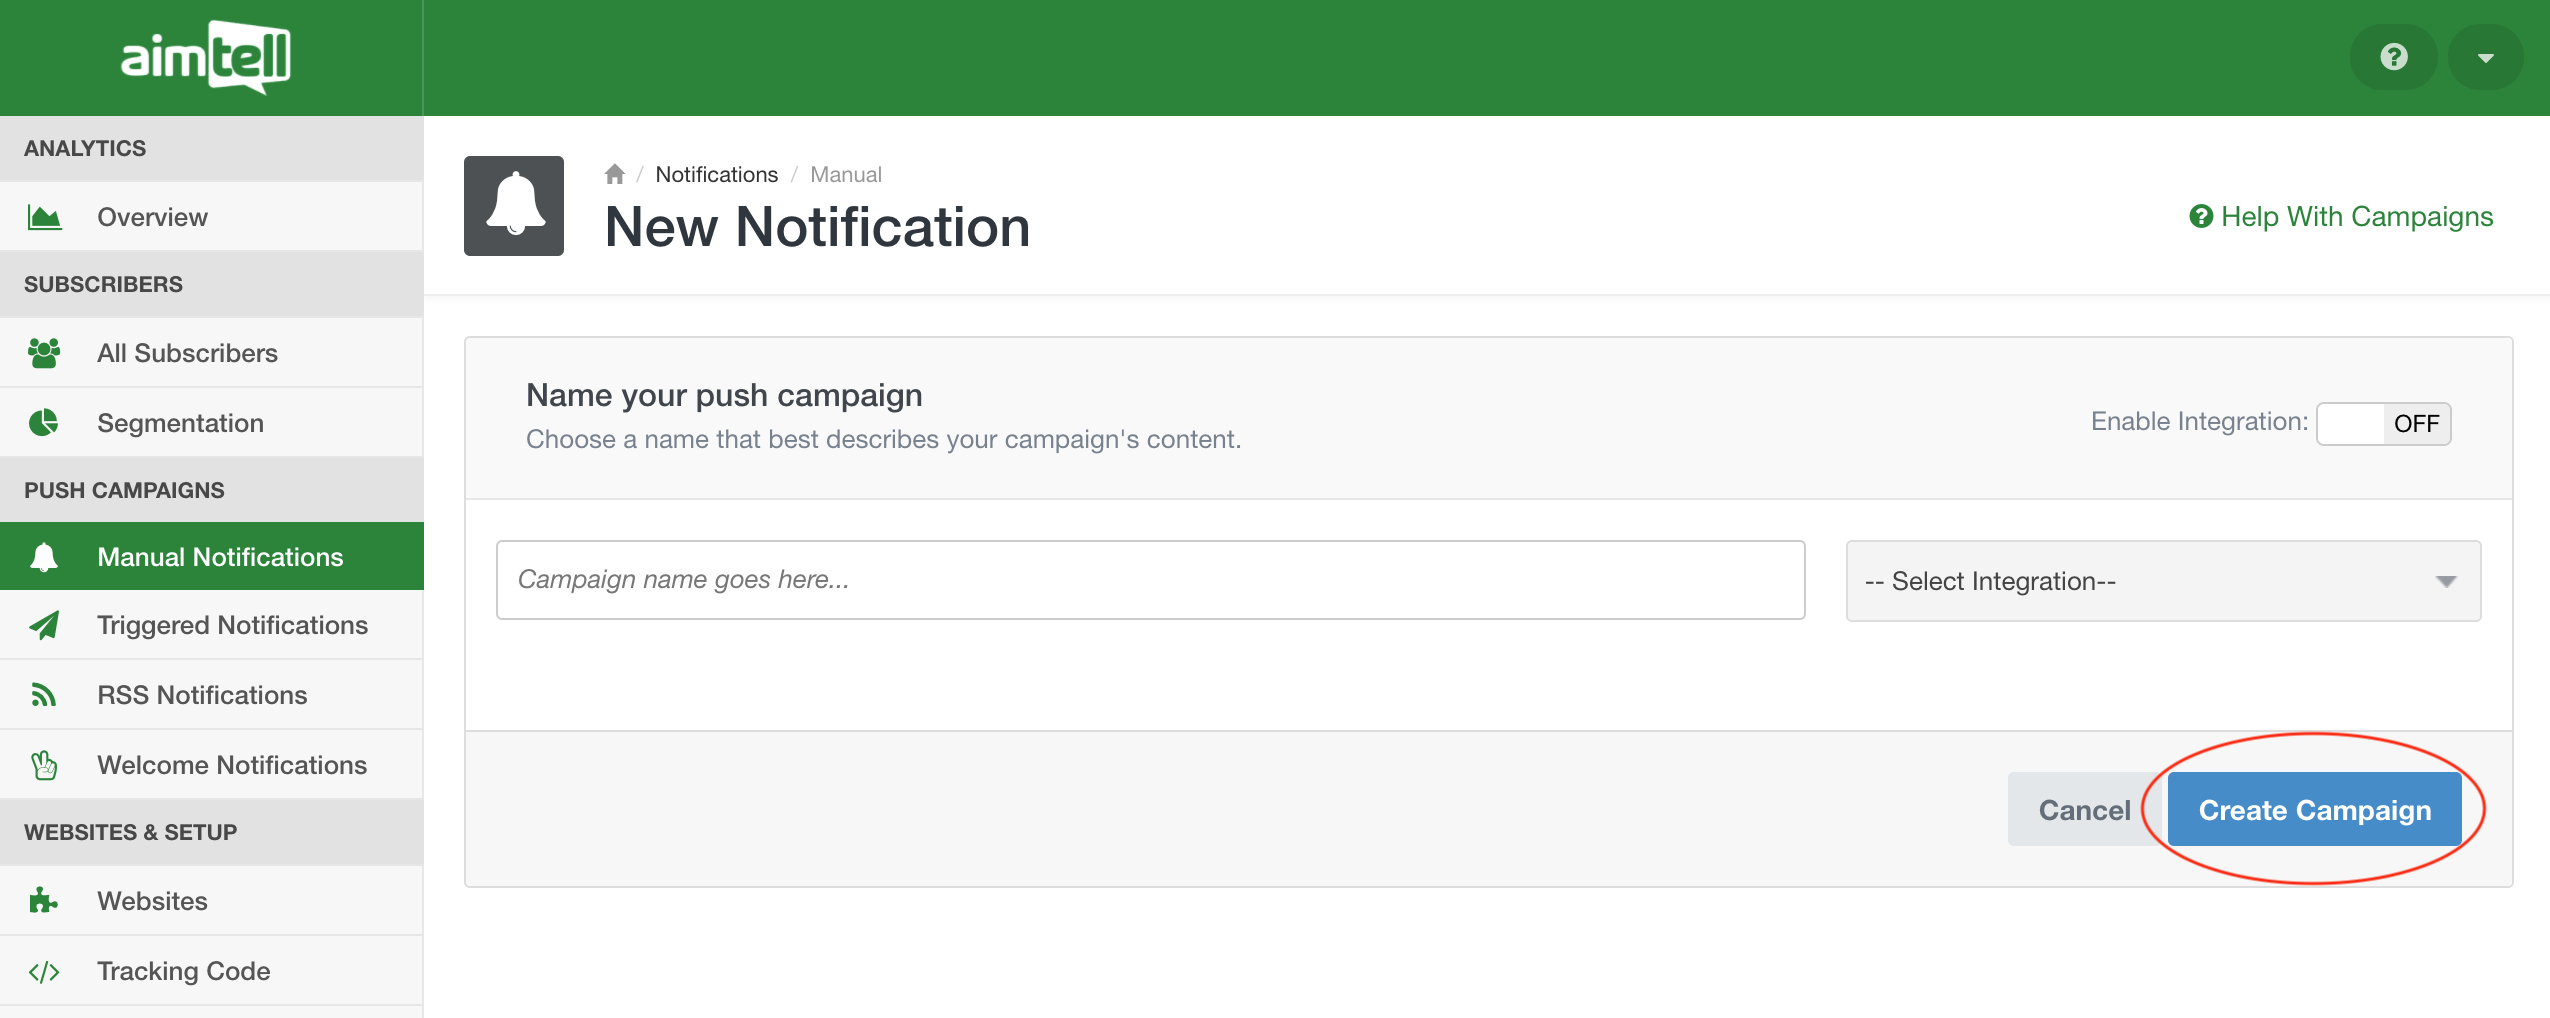
Step 2: Create a New Manual Campaign
To create a new campaign, hit the ‘New Campaign’ button. This will allow you to set up a new manual campaign. Give the campaign a name and hit ‘Create Campaign.’
Step 3: Input Campaign Info
Now it’s time to build your actual campaign. Enter your title, body, destination URL, and optionally a custom icon or large image.
Note: You can also add up to two action buttons. Action buttons are a great way to customize your push notifications and also provide the opportunity to add two additional landing pages to your push. You can read more about utilizing the action button here.
In this example, we are preparing a sale announcement notification. In the next step, you will decide whom to send this campaign to.
 Step 4: Select Your Segments
After you finish inputting your campaign information, select the ‘Targeting’ tab to determine who will receive this notification. Here you will select which segment (or segments) you wish to include. Select ‘All Subscribers’ if you want this campaign to send to everyone, or select the individual segments you want to target instead.
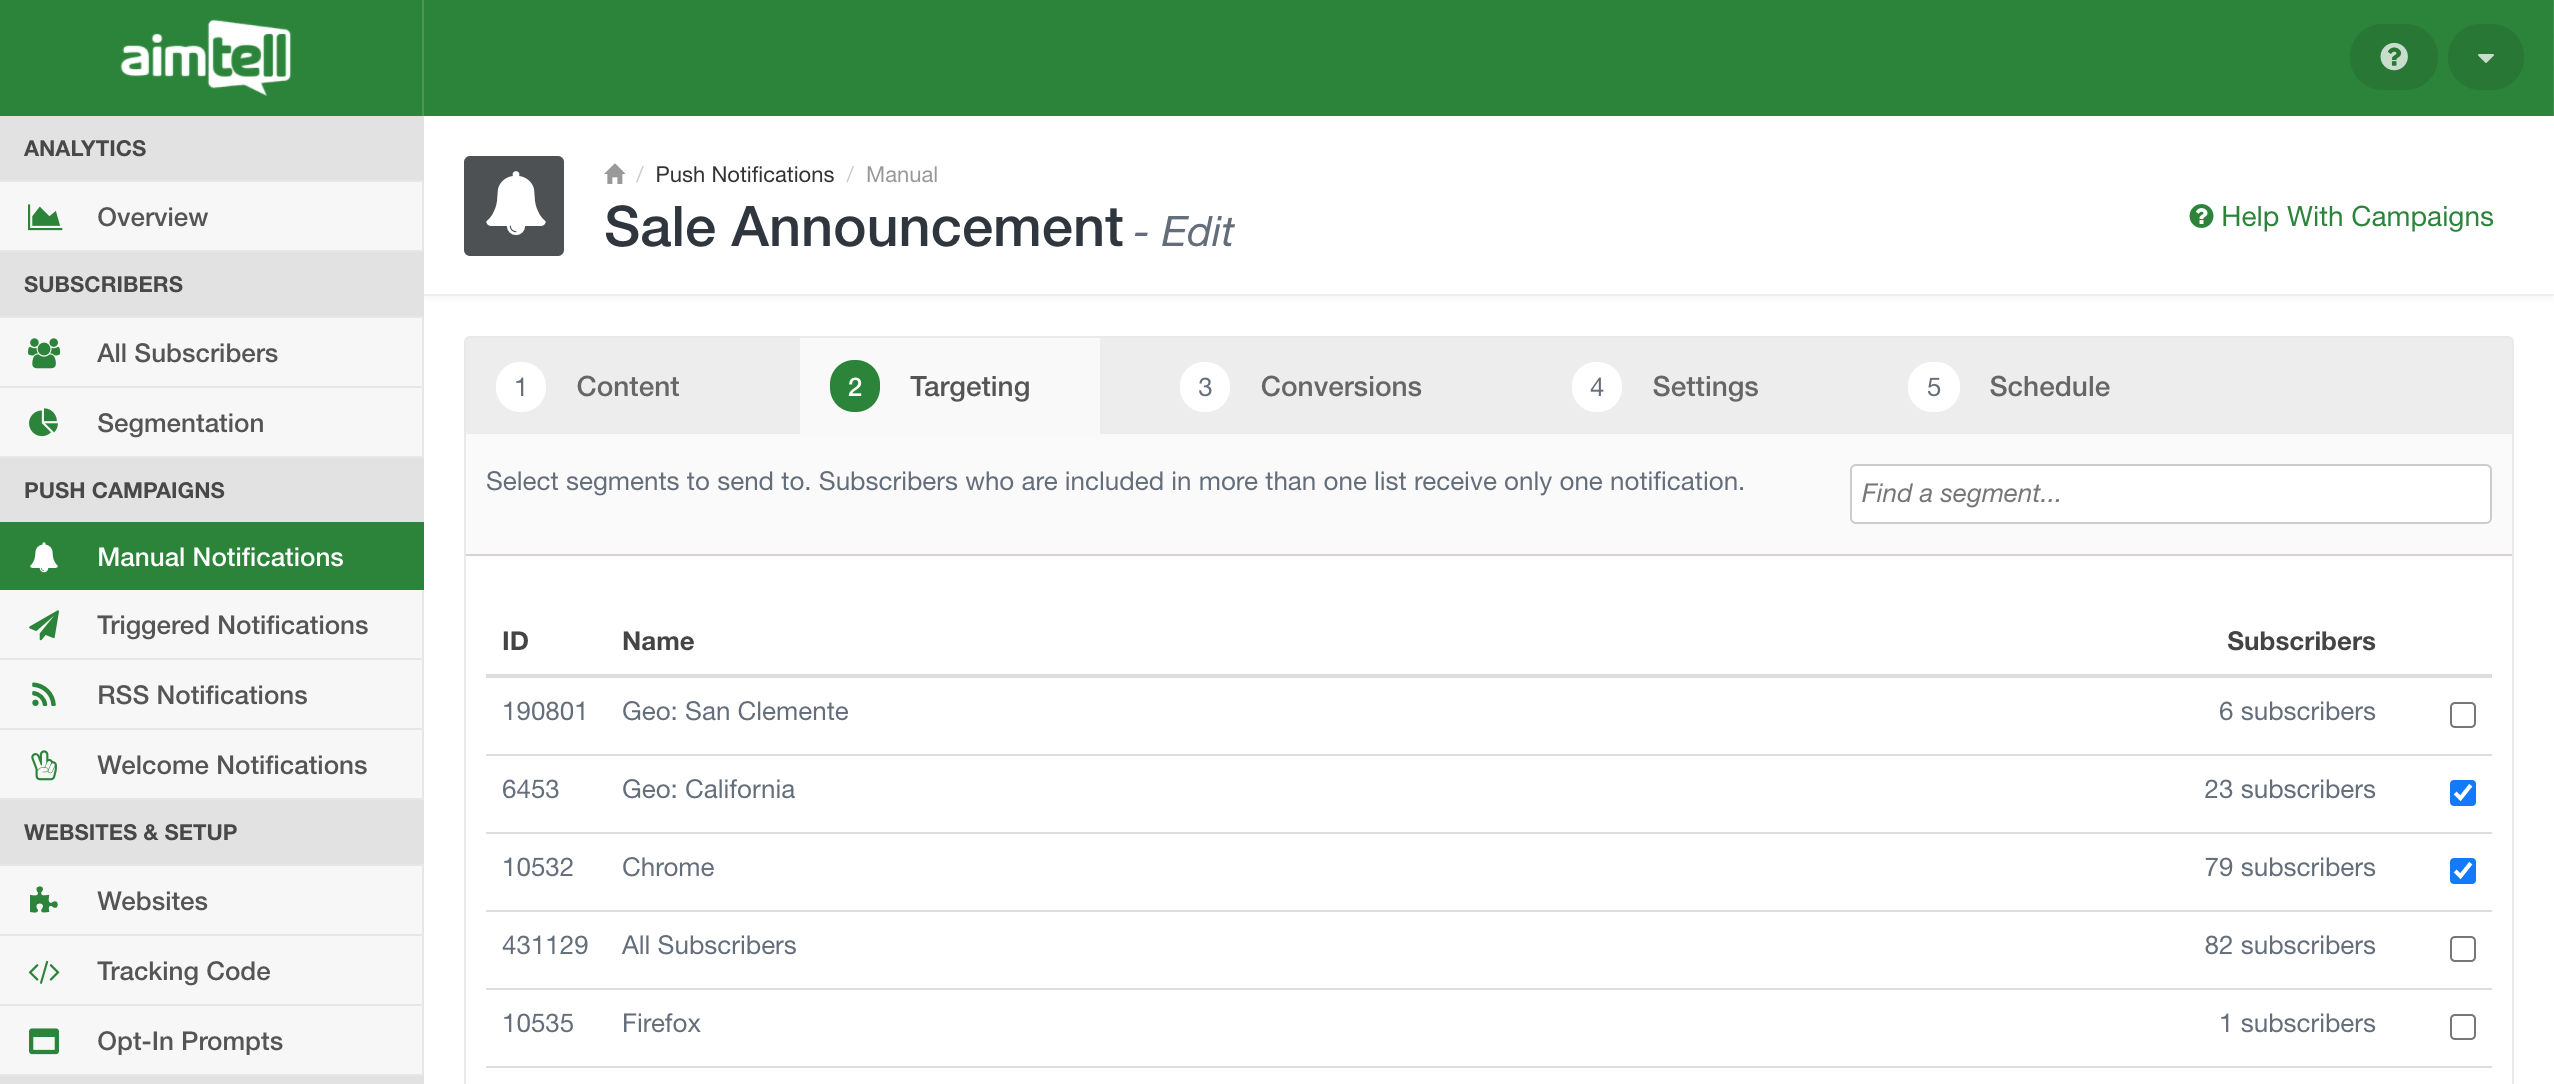
In this example, we are choosing to target users who live in California and those who use Chrome as their browser.
Note: If users are part of multiple segments that you select, they will only receive one notification.
Step 5: (Optional) Enable Conversions
After determining who will receive this notification, you can choose to enable conversions. Select the third tab ‘Conversions’ to do so. You have to first toggle conversion tracking on and then you have to specify an Event Category and Event Action. You can also optionally specify an event label by selecting the ‘Advanced’ button.
Because this is a sale announcement campaign, we set up conversion tracking for items purchased. If you need help with this, please read our conversion tracking documentation.
Step 6: Determine the Campaign Settings
Head to the next tab ‘Settings’ and determine if or how often you want this campaign to repeat. You can either have it sent just once, or can set it to repeat either daily, weekly, or monthly. If you do choose to repeat your notification, you can also optionally set an end date.
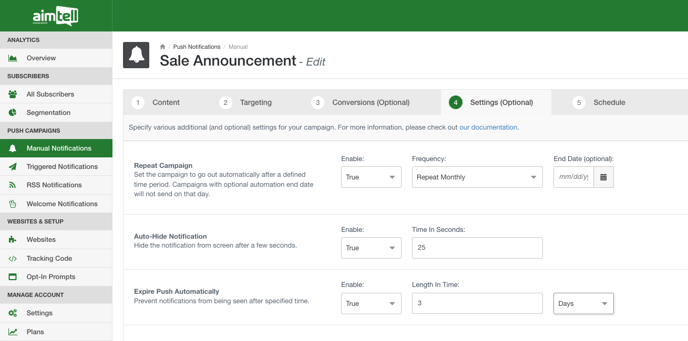
- Repeat Campaign: If set to ‘True’ you can determine the frequency that you want the campaign to repeat. Campaigns can repeat daily, weekly, monthly, or at a custom frequency*. You can also set an end date if you want to stop the repeating campaign automatically on a certain date.
- Auto-Hide Notification: If set to ‘True’ the campaign will auto-hide after a specified number of seconds.
- Expire Push Automatically: If set to ‘True’ the campaign is prevented from being seen entirely after a specified time. You can set the length of time in either minutes, hours, or days. We recommend enabling this feature if you are advertising something like a short-term sale. You can set the push to expire automatically once the sale ends so that you don’t confuse any of your subscribers who see your notification later. You can read more about this feature in our notification expiration documentation.
*Custom frequency repeating campaigns are available for Enterprise clients only.
Step 7: Schedule Your Push Notification
Now for the final step- it is time to schedule your push notification! Here you will select the date and time you want your notification to be sent.

You can also decide if you want to optimize the campaign by user timezone. Simply check the box if you would like to do so. If enabled, this will deliver your push notification based on the timezone of each subscriber instead of your own. Make sure if you want to do this that you schedule your campaign at least 24 hours in advance. Learn more about this feature in our timezone optimization documentation.
Finally, hit ‘Schedule Push’ at the bottom of the page and your campaign will send at the specified time. Campaigns may also be saved as drafts and edited at a later time. Please note that scheduled notifications will be locked once the scheduled date is reached, as they will begin spooling.
Note: If you create a repeating campaign you can choose to pause the campaign at any time. To do this, head to your list of manual campaigns. Select one (or multiple) campaigns and from the ‘Options’ menu, you can either select to pause the campaign or to resume the campaign.
Viewing Results
To view the results of any campaign head to 'Manual Notifications.' On the overview page, you will see results from campaigns that you have sent. From the ‘Show/Hide’ menu you can select which metrics you would like to see on your overview page.
Note: The data will default to the all-time numbers for each campaign. If you prefer to see the data from a specific date range, select the ‘Dates’ tab at the top, input the date range you want, and click update to see results from that specific period of time.
To view the results of a specific campaign, find it in your list and click "View Results." On the results page, you will see a quick preview of your notification as well as totals for the number of notifications sent, clicked, and any conversions tracked. If you specified an event value, such as a dynamic Dollar Amount, you will also see the total conversion value. Read our viewing campaign results documentation for a more detailed overview of the information you can find here.