Install On Instapage
You have a few options for installing Aimtell on Instapage. If you are a WordPress site you will use our Aimtell plugin and the Instapage plugin. For non-WordPress sites, installing Aimtell is still possible, however, it requires an additional workaround since Instapage does not allow you access to the root directory in order to upload our service worker. We will solve this by installing via Cloudflare.
If you have a WordPress website, click here for the installation steps .
If you do not have a WordPress site, click here for the installation steps .
Install Aimtell on Instapage using a WordPress Website
Before getting started: Make sure you have an Instapage account created.
Step 1: Create an Aimtell account and install the Aimtell WordPress plugin
First, create an account at Aimtell for your WordPress site. Then, head over to your site and install our Aimtell plugin. Once it is installed and activated you will see Aimtell in the WordPress sidebar. 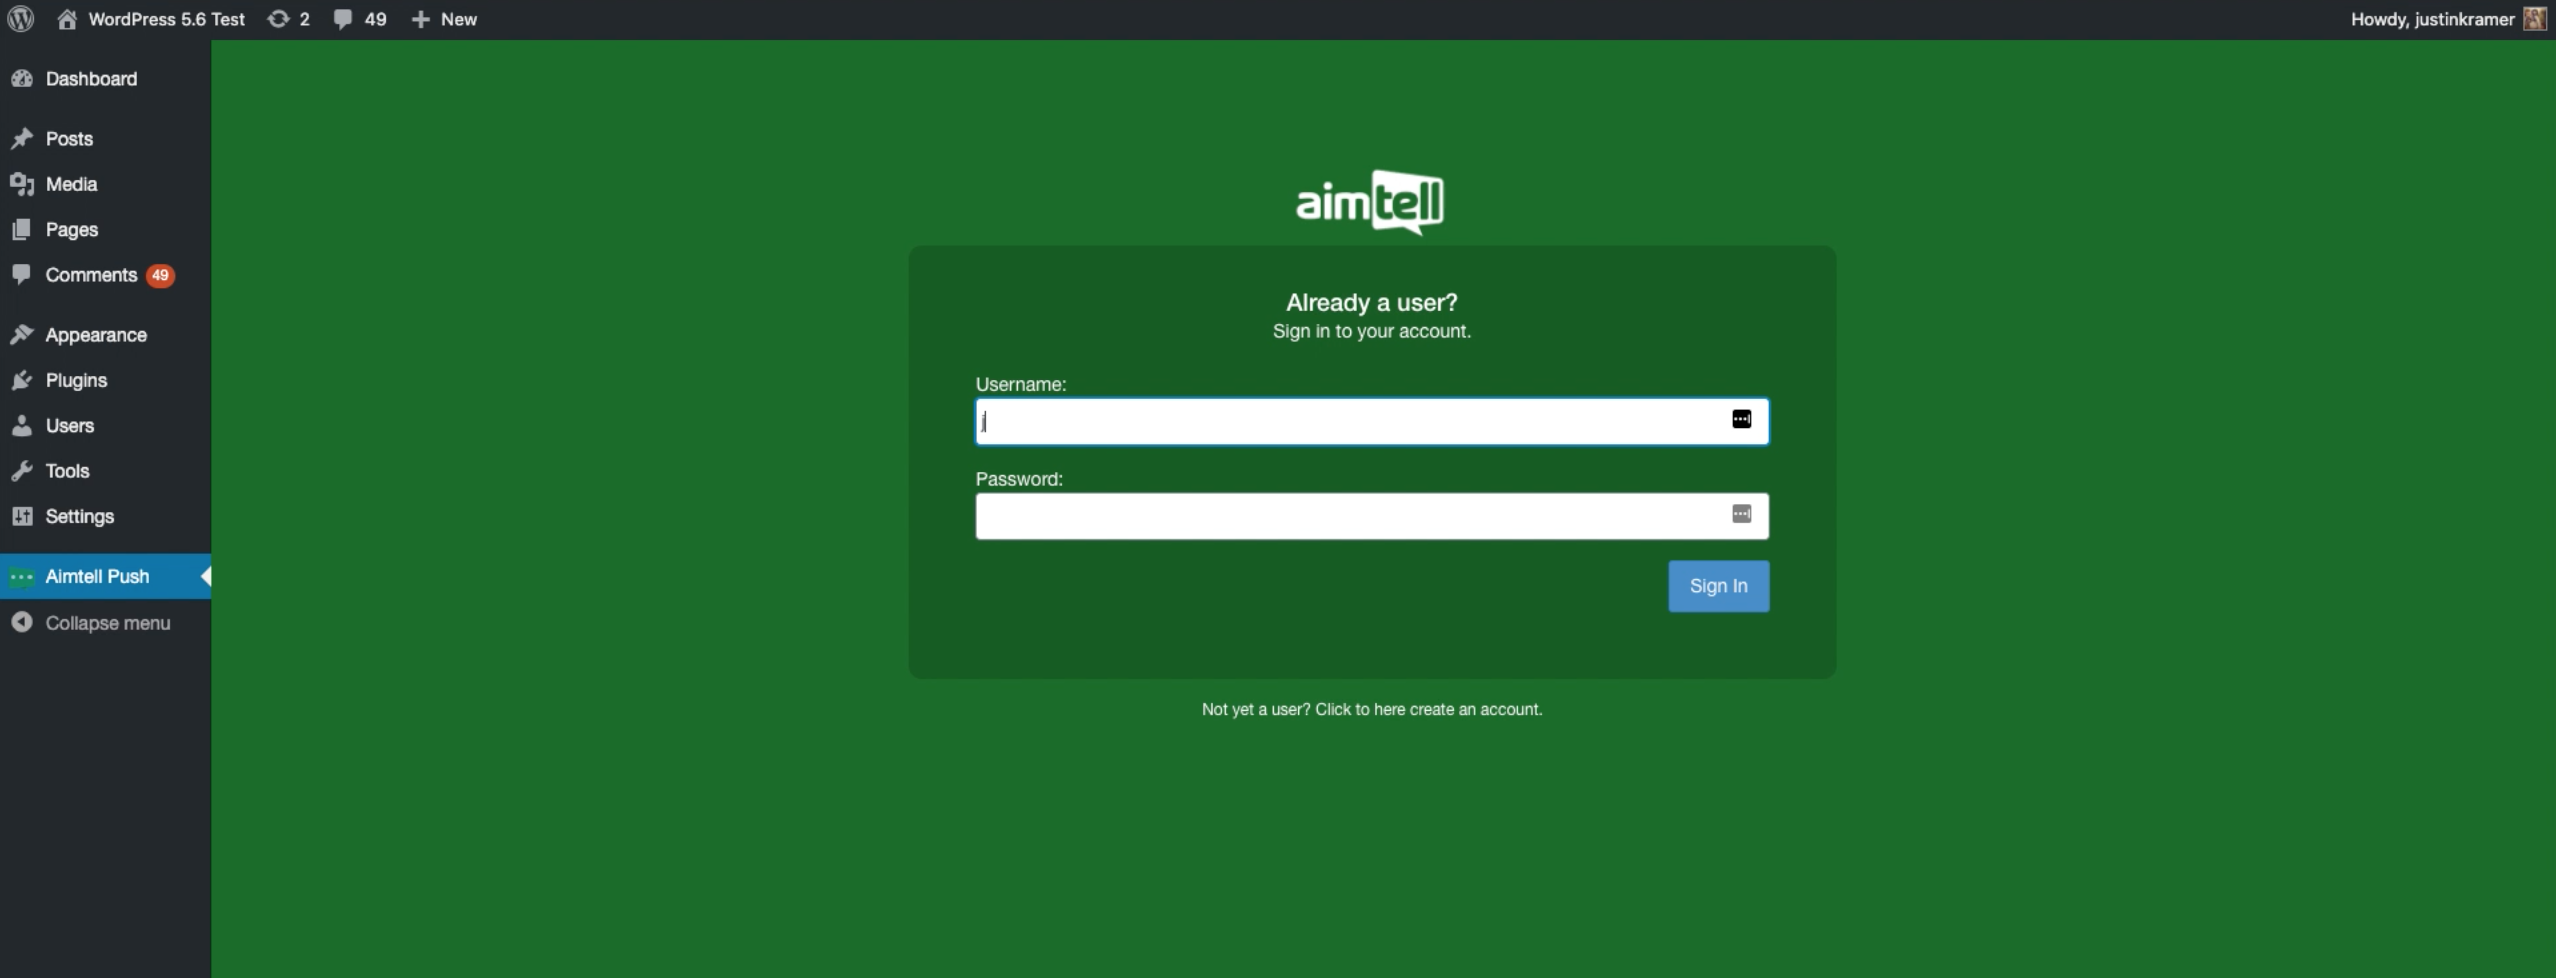
Go ahead and log in to the existing or new Aimtell account that you have created (or if you didn’t already create one, you can do so now).
Step 2: Install the Instapage plugin and connect your workspaces
Next, install and activate the Instapage plugin at your WordPress site. Select Instapage from the sidebar, select the ‘Settings’ tab at the top of the page, and log in to your Instapage account.
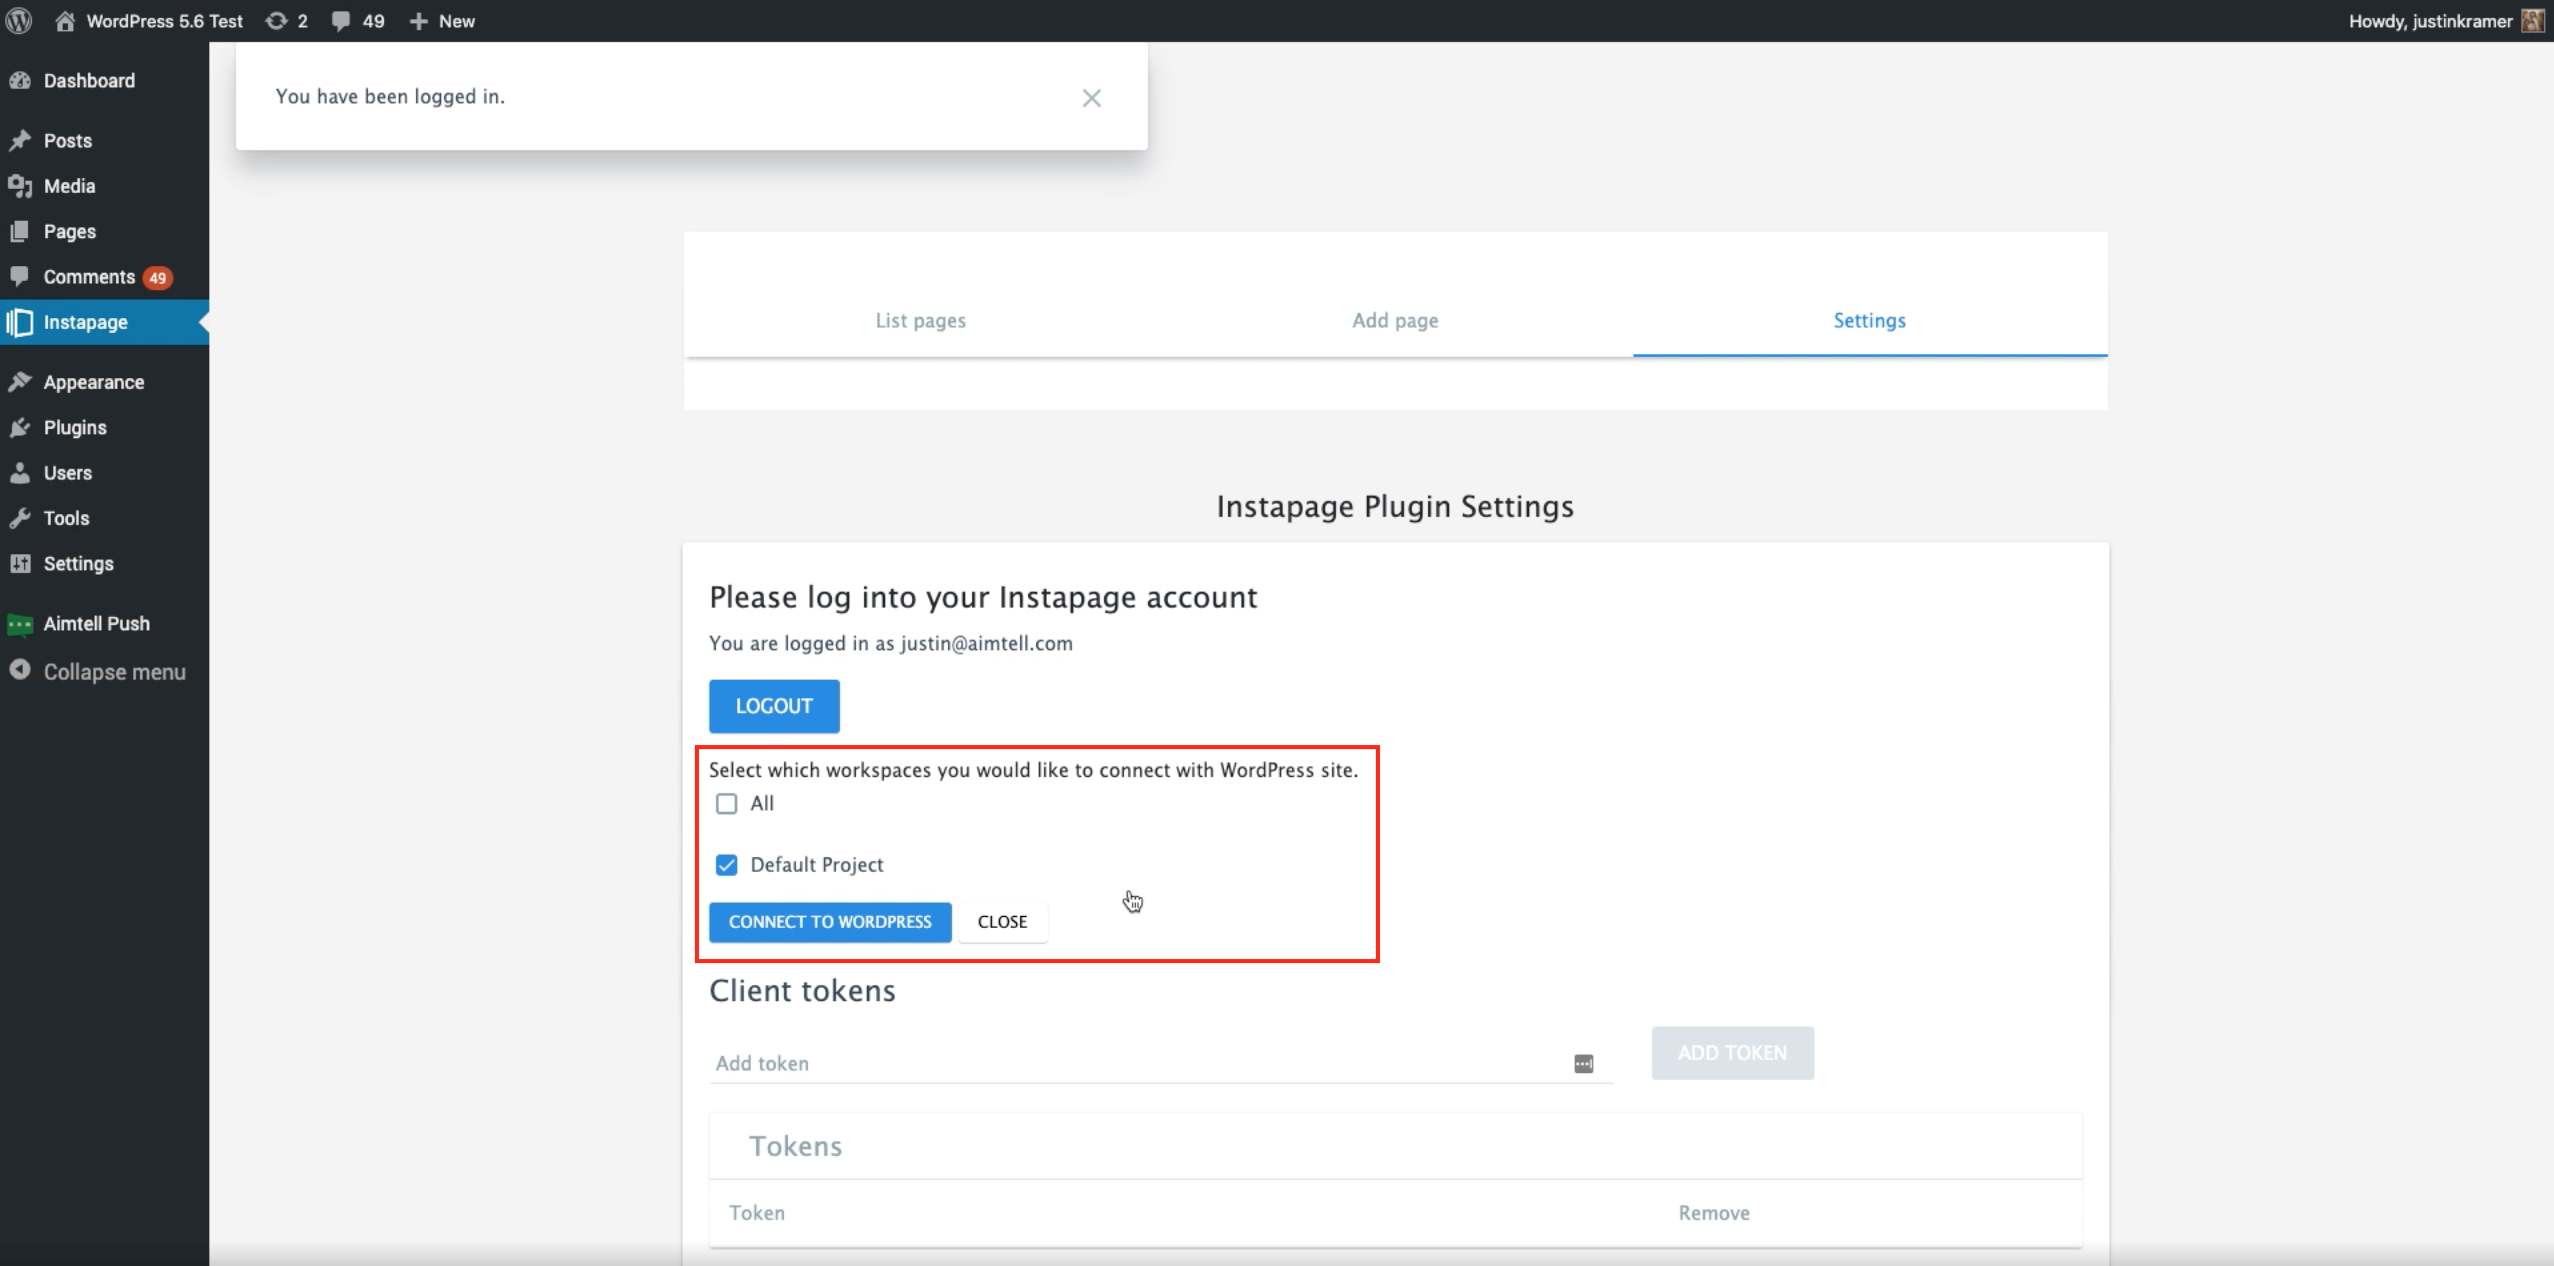 Once logged in you can select the workspaces you wish to connect. Select ‘All’ or ‘Default Project’ and hit ‘Connect to WordPress.’
Step 3: Create your landing page at Instapage and add Aimtell tracking code
Navigate to the front end of your WordPress site now and pull up the developer tools. Select the ‘Elements’ tab and search for ‘_at’ in order to locate the tracking code.
![]() Right-click on the code and select ‘Edit as HTML’ in order to easily copy the code.
Right-click on the code and select ‘Edit as HTML’ in order to easily copy the code.
Now you can create your actual landing page over at Instapage. You can either create a new landing page or work with a landing page you’ve built previously. Select the page you want and then click ‘Scripts & GDPR.’
![]() You then need to paste the copied tracking code into the body tag in the Tracking Scripts section. Hit save. Once this is finished you can publish your landing page.
You then need to paste the copied tracking code into the body tag in the Tracking Scripts section. Hit save. Once this is finished you can publish your landing page.
Step 4: Publish the landing page and add to WordPress
Select ‘Publish Experience’ to publish your landing page. You will then be asked where you would like to publish the page. Select ‘WordPress’ and then click ‘Push to WordPress.’
Head back to your WordPress dashboard and click Instapage in the sidebar. Select the ‘Add Page’ tab and make sure the page you published is listed as the Landing Page.
 Give it a URL (in this example we used ‘Instapage’) and then hit ‘Publish.’ You can then click the URL to see the live landing page and you should see an opt-in prompt appear. Your landing page will now start collecting subscribers!
Install Aimtell on Instapage using Cloudflare
Before getting started: Make sure you have both an Instapage and Cloudflare account created.
Step 1: Create an Aimtell account and install with Cloudflare
First, if you haven't already, create an account at Aimtell. You then need to install the Aimtell service worker with Cloudflare. For instructions on how to do this, please follow our Install With Cloudflare documentation for step-by-step instructions.
Step 2: Connect your domain at Instapage
From the Instapage dashboard head to Settings > Domains and then click ‘Connect Domain.’
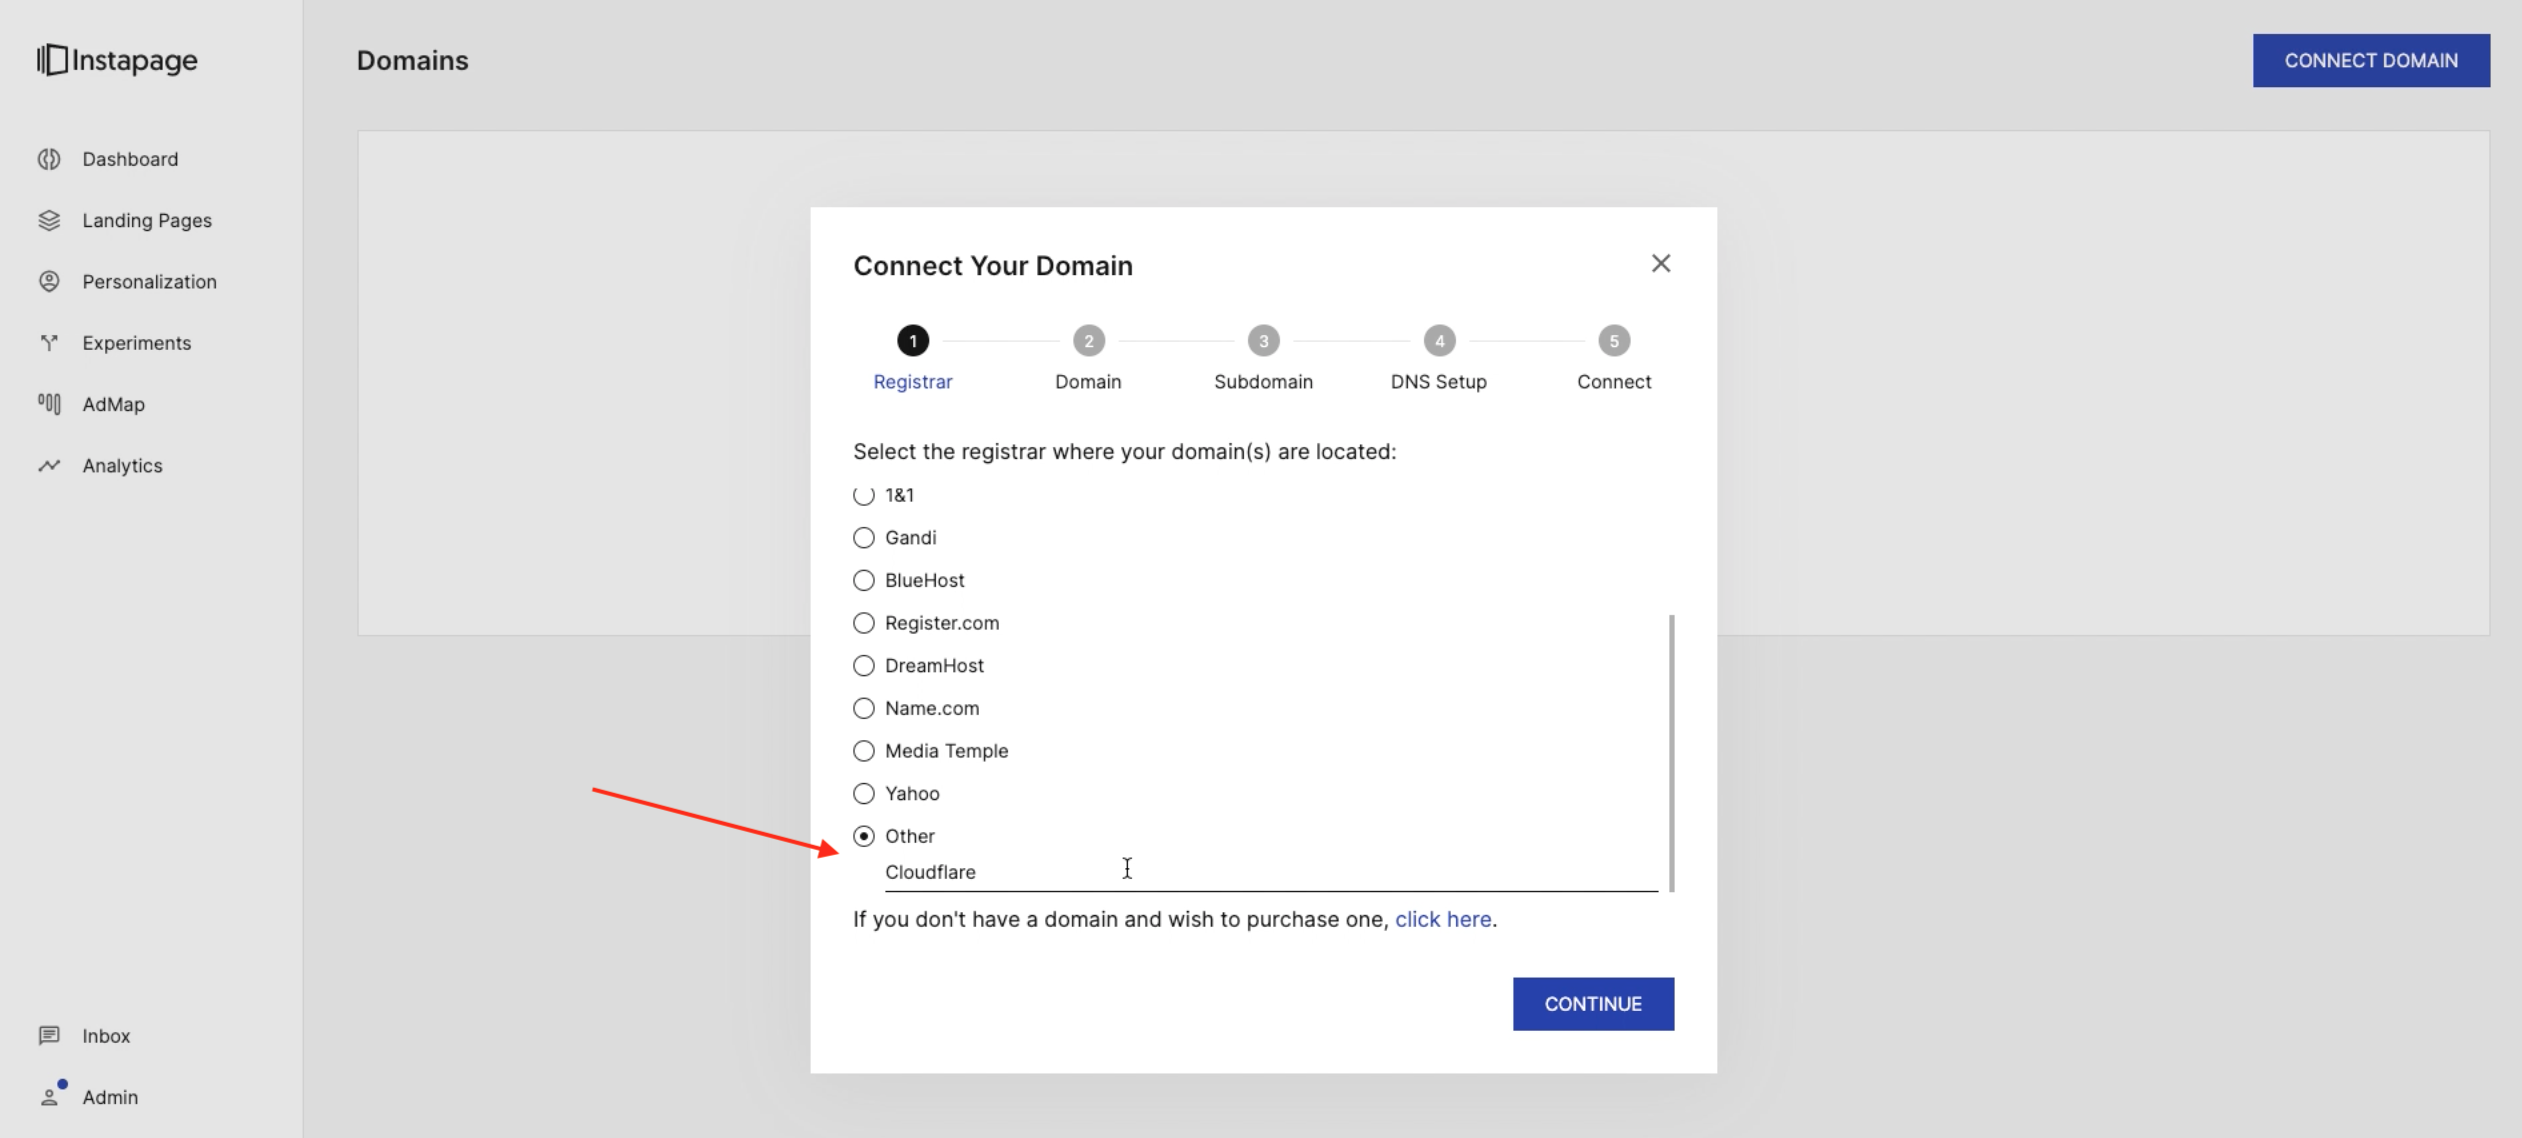 Scroll down, select ‘Other,’ type in Cloudflare, and hit continue. On the next tab, enter your top-level domain and hit continue. Next, enter a subdomain for your landing page (for example, instapage.yourdomain.com) and hit continue. This subdomain address is the website you should have added to Aimtell.
Step 3: Complete the DNS setup
Next, navigate back to Cloudflare to set up your DNS records. In this step you will create a CNAME record. From the Cloudflare dashboard select ‘DNS’ and then click ‘+ Add record.’
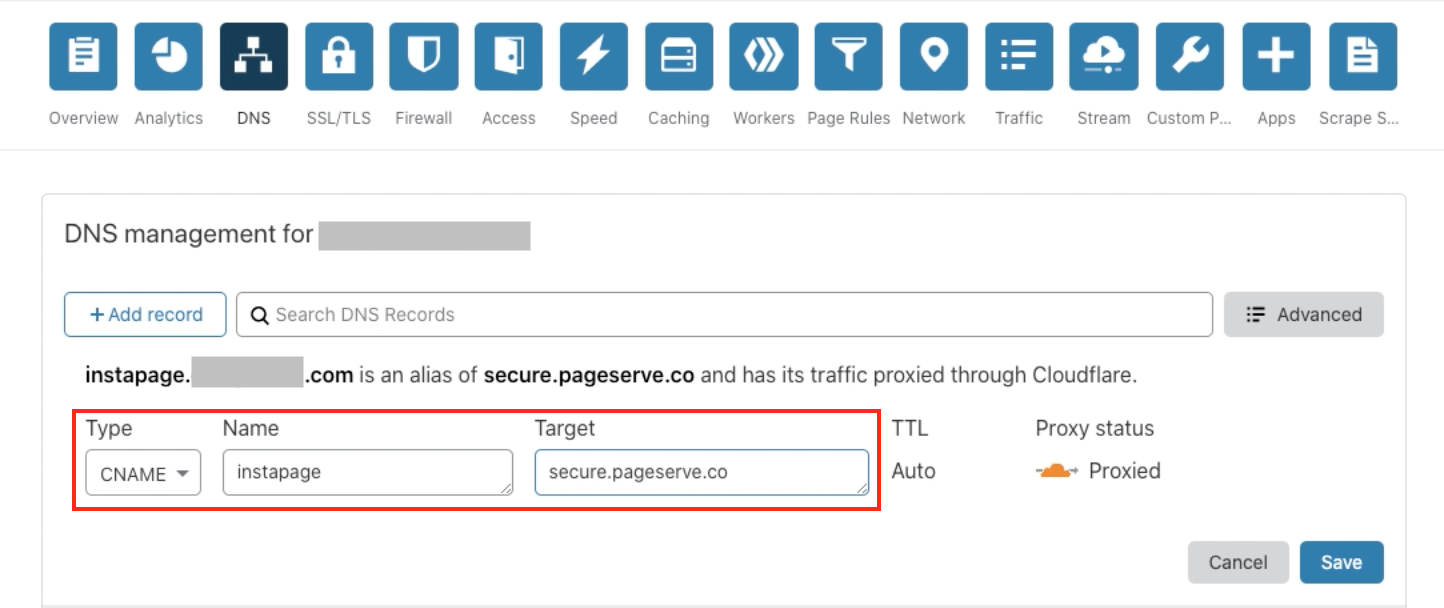 The type of record is CNAME, the name is your subdomain (in this example that is instapage), and the target is secure.pageserve.co. Input this information and hit save. Head back to Instapage and press continue.
If you entered all the information correctly, your domain should appear and will be successfully connected.
Step 4: Create your landing page and add Aimtell tracking code
Head over to your Aimtell dashboard now in order to grab our tracking code. Select ‘Tracking Code’ from the sidebar and copy the code displayed there.
Go back to Instapage to create your actual landing page. Once you create a page it will appear in your list of landing pages in your Instapage dashboard. Select the page from the list and then click ‘Scripts and GDPR.’
![]()
Paste the tracking code in the ‘Tracking Scripts’ section in the body tag section. Hit save. Once this is finished you can publish your landing page.
Step 5: Publish the landing page
Select ‘Publish Experience’ to publish your landing page. You will then be asked where you would like to publish the page. Select ‘Custom Domain’ and then select the domain that you have been using for this setup process. Hit confirm and your page will be live.
You can now navigate to the live landing page and you should see an opt-in prompt appear. Your landing page will now start collecting subscribers!